BellaGrey Designs: black
black

I get really excited this time of year to wrap all the gifts I purchased for my family and friends. I like to take the time to make each gift look special and pretty. 


My love for a beautifully wrapped gift started with my first job in high school. I worked for a high end department store in Denver, in their gift wrap center. I learned the very essence of gift wrapping, with embellishments, different textures and of course, how to make the edges of the gift crisp. 


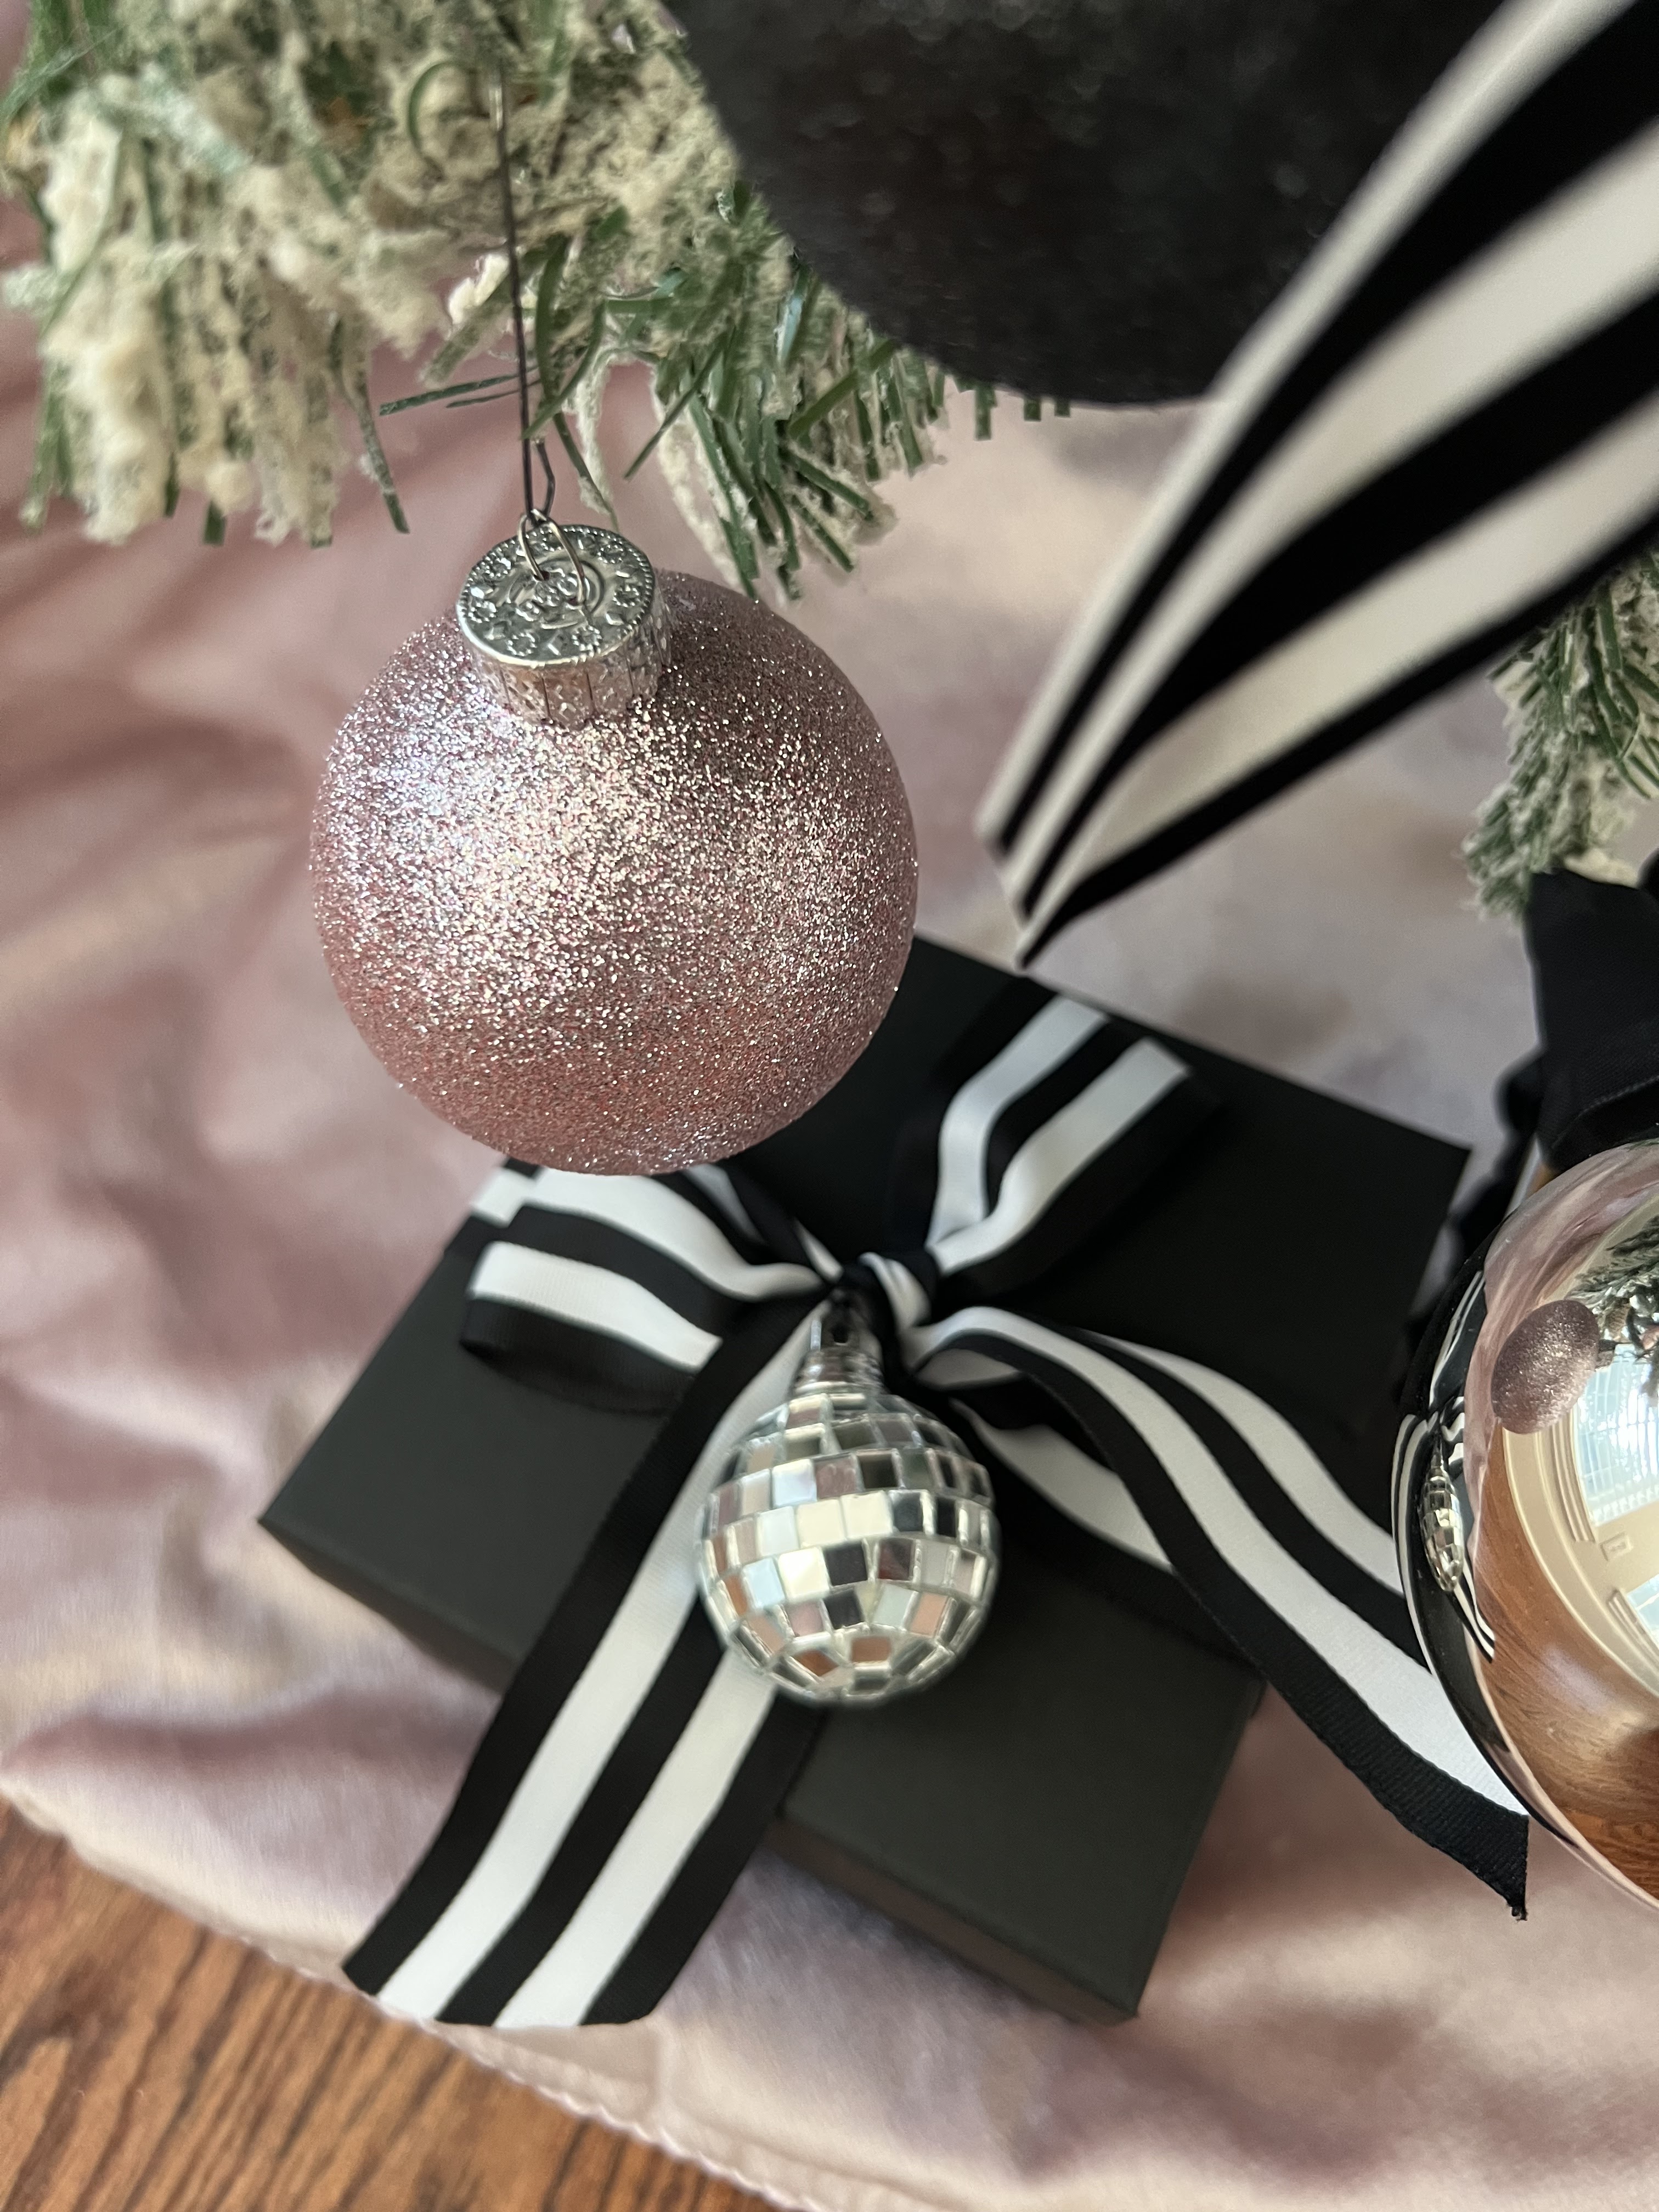
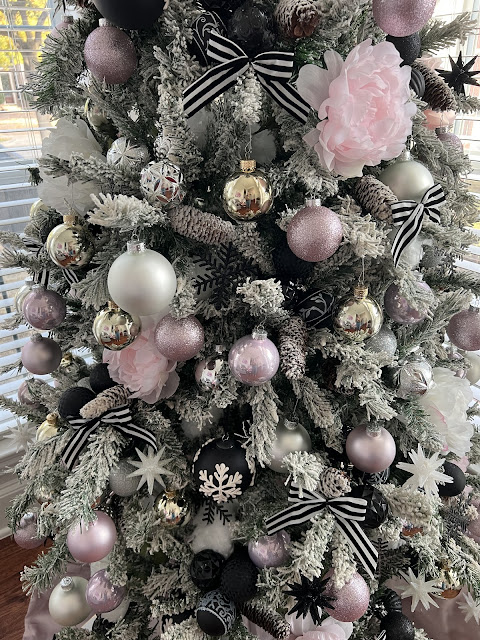
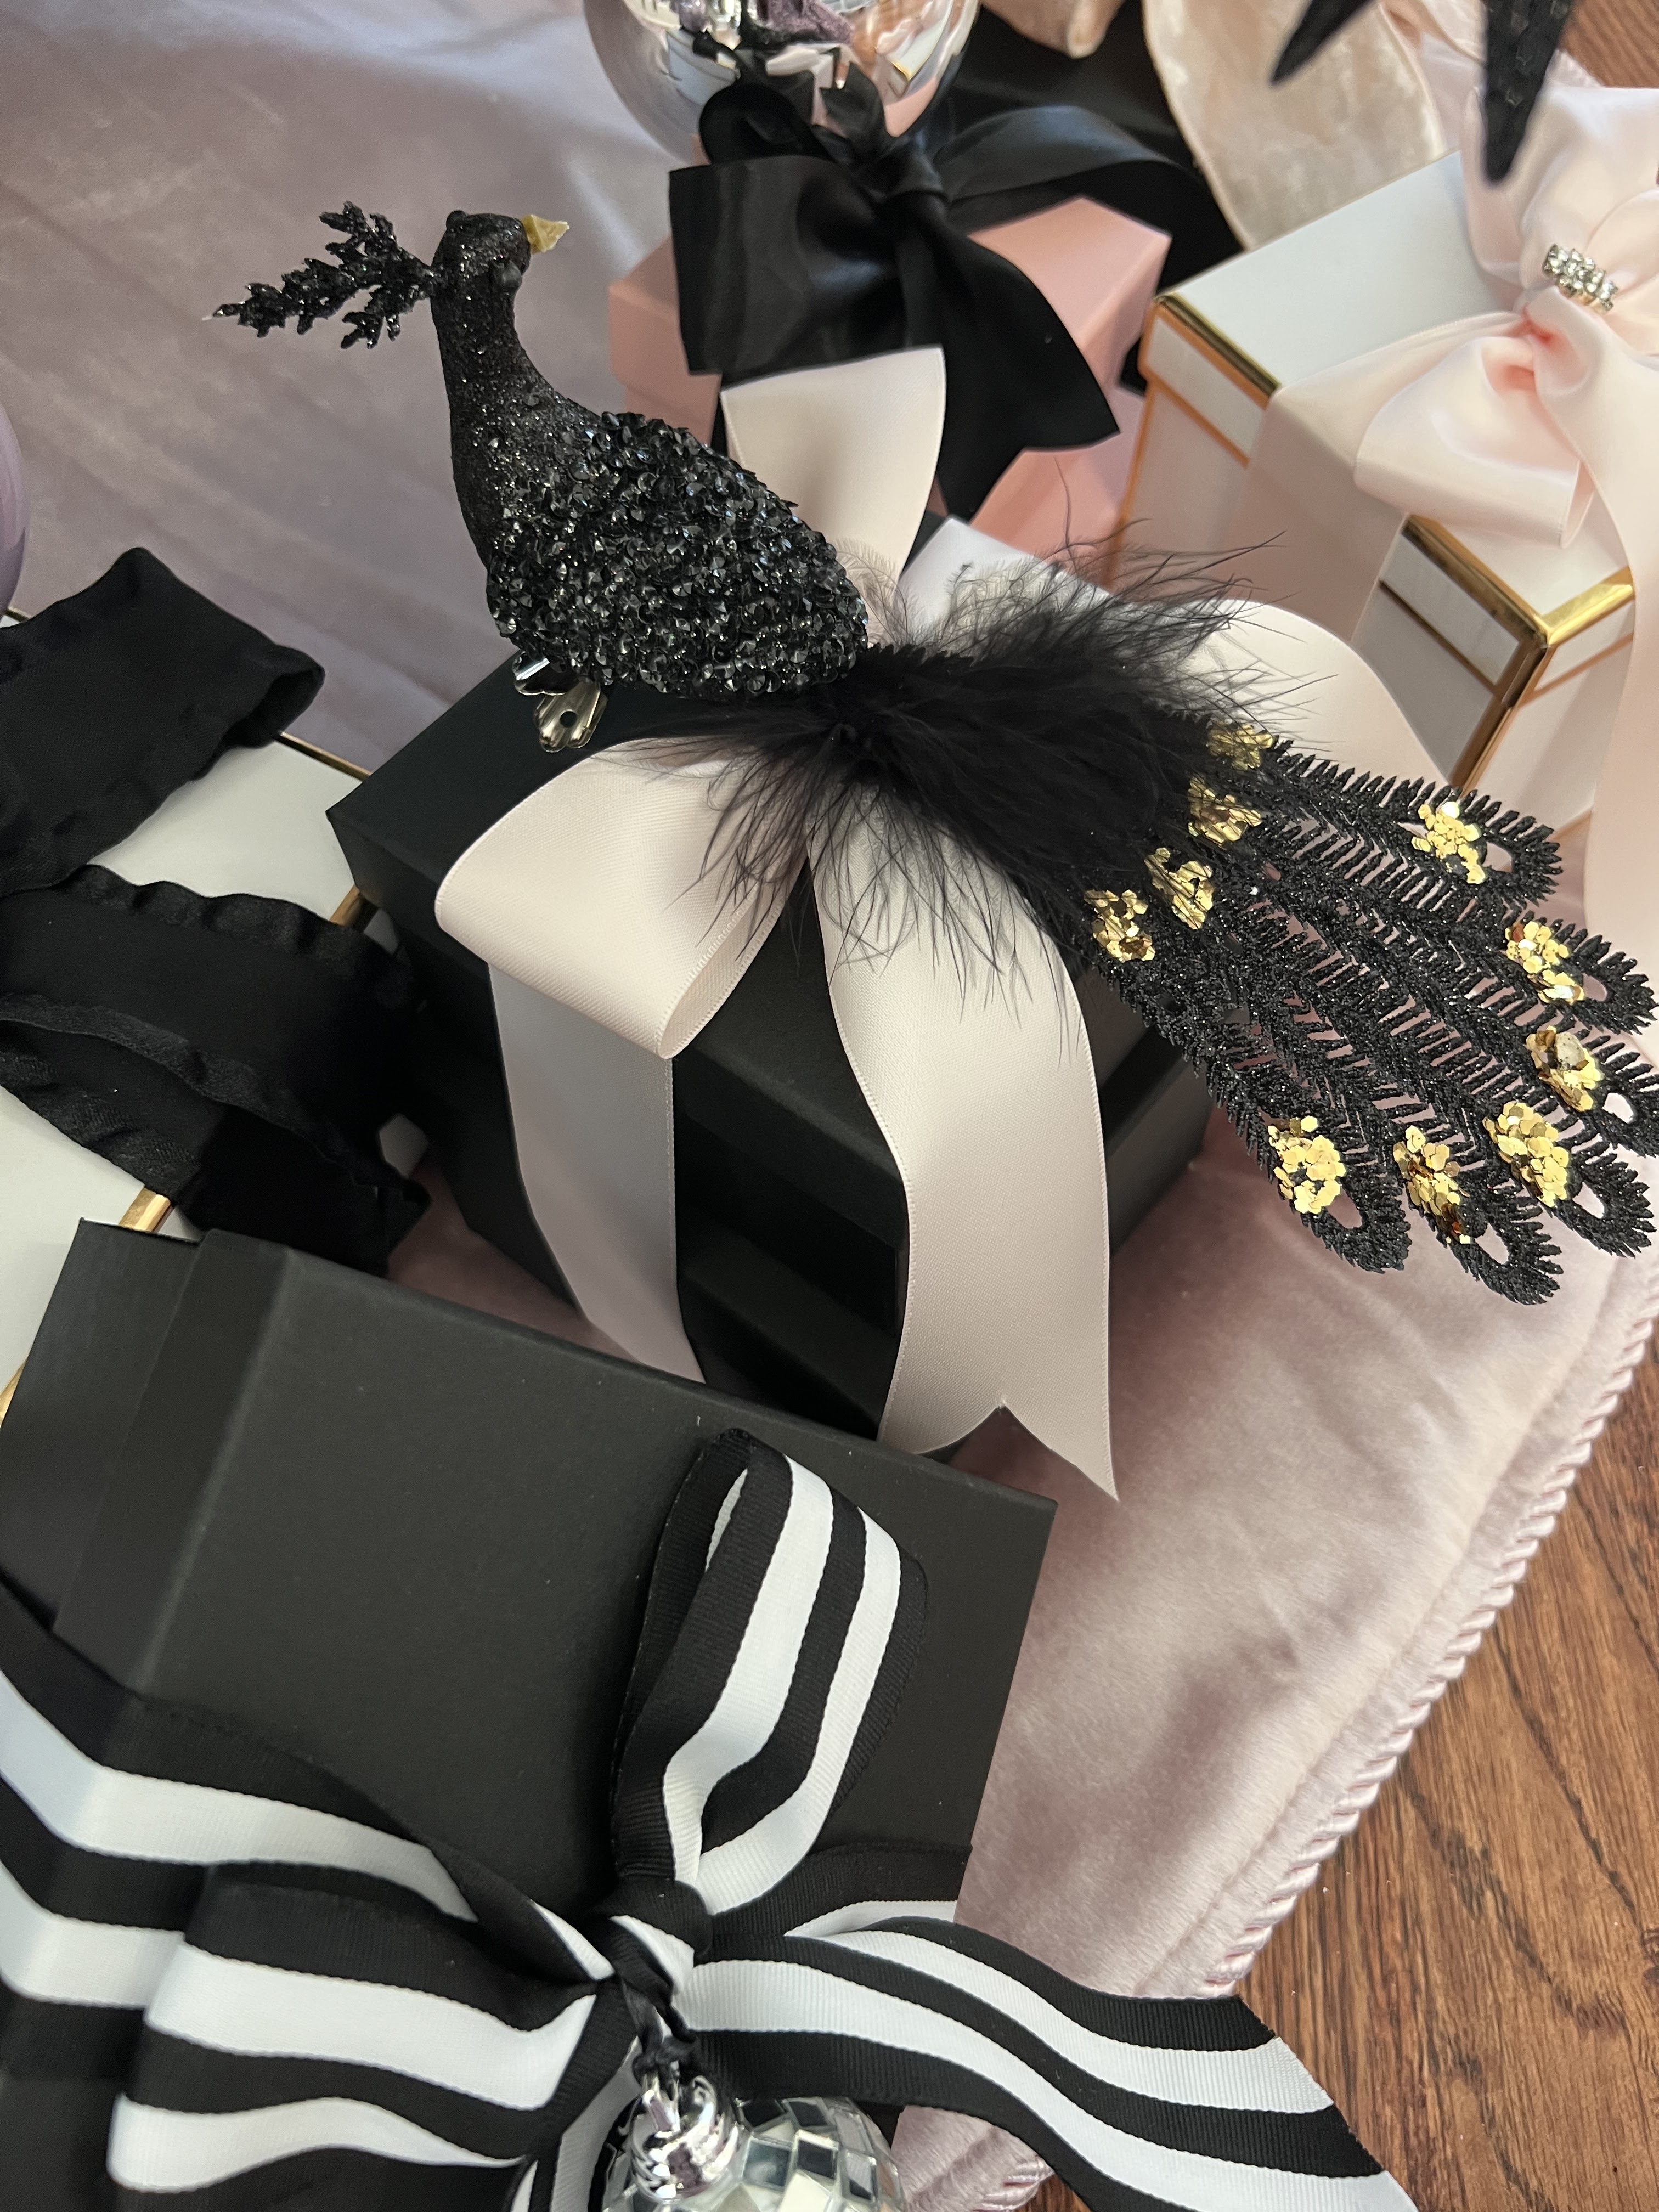
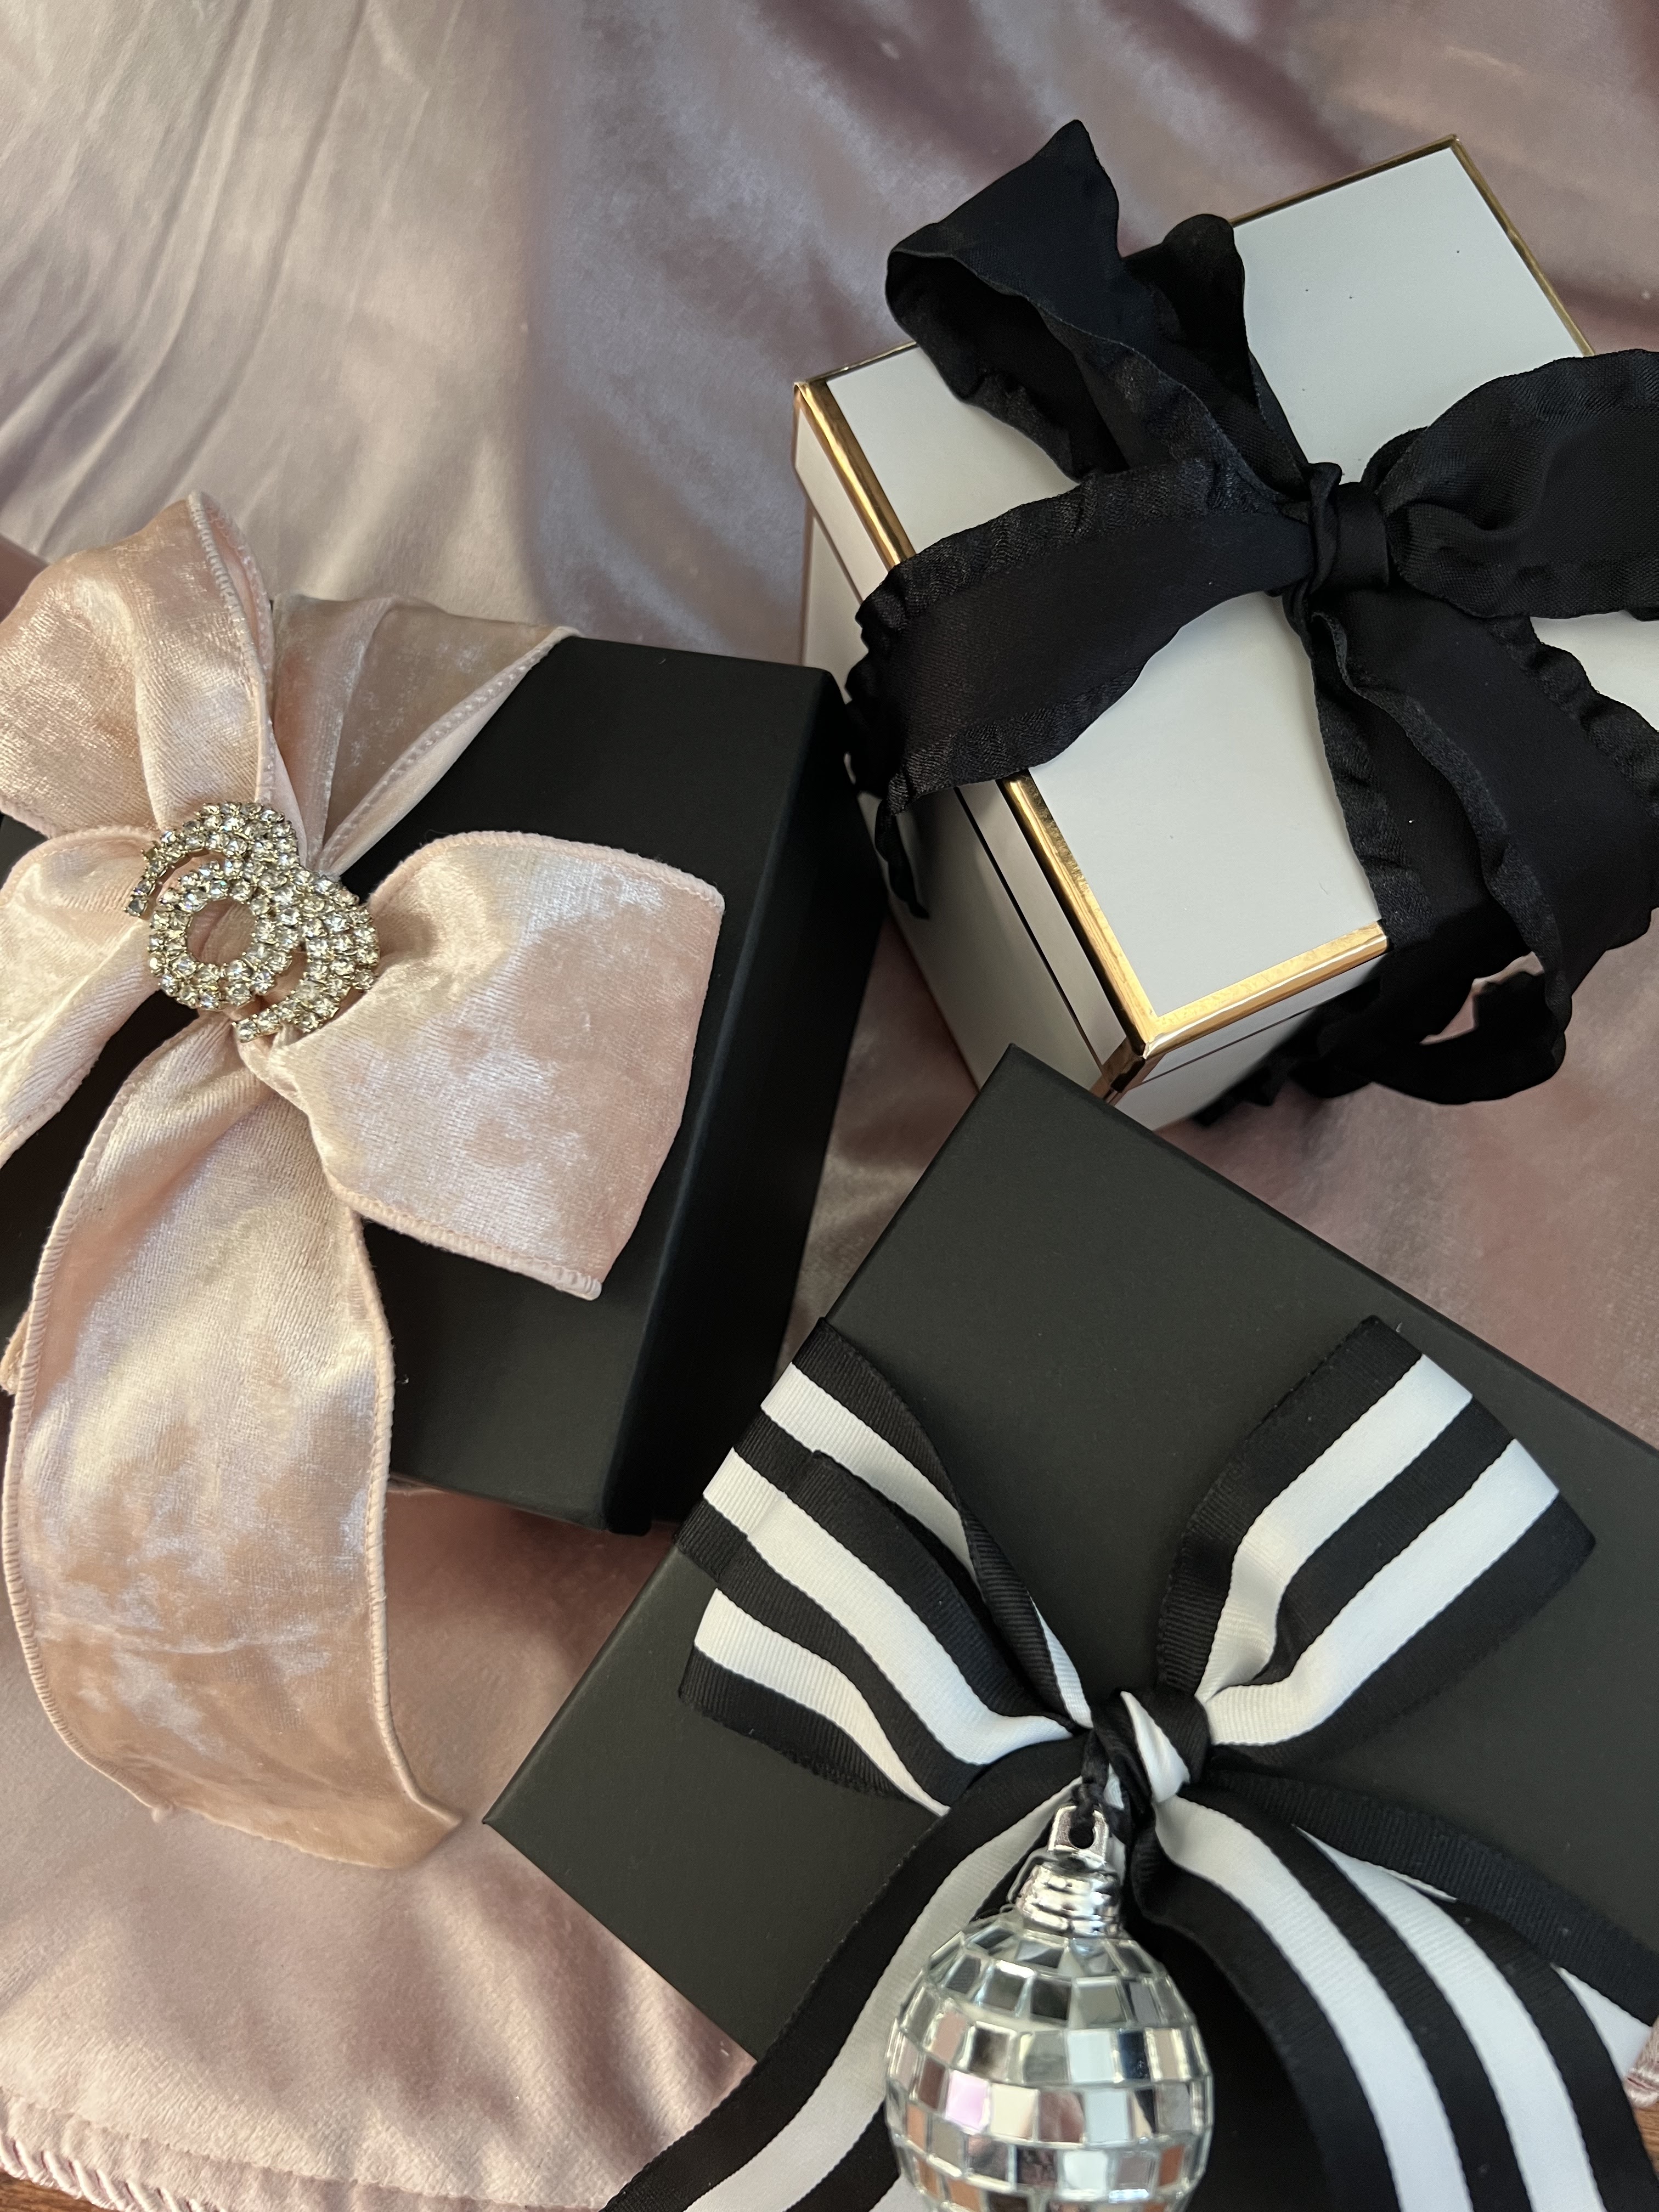
As I’ve grown older, my fondness of gift wrapping has evolved. Black paper is one of my favorites as it is both, powerful and chic. The unexpected elements, such as vintage brooches, flowers, crystals, feathers and pearls, is what sets my gifts apart from any others. This year I went with a more glamorous Christmas theme, so I designed my gift wrapping accordingly. 
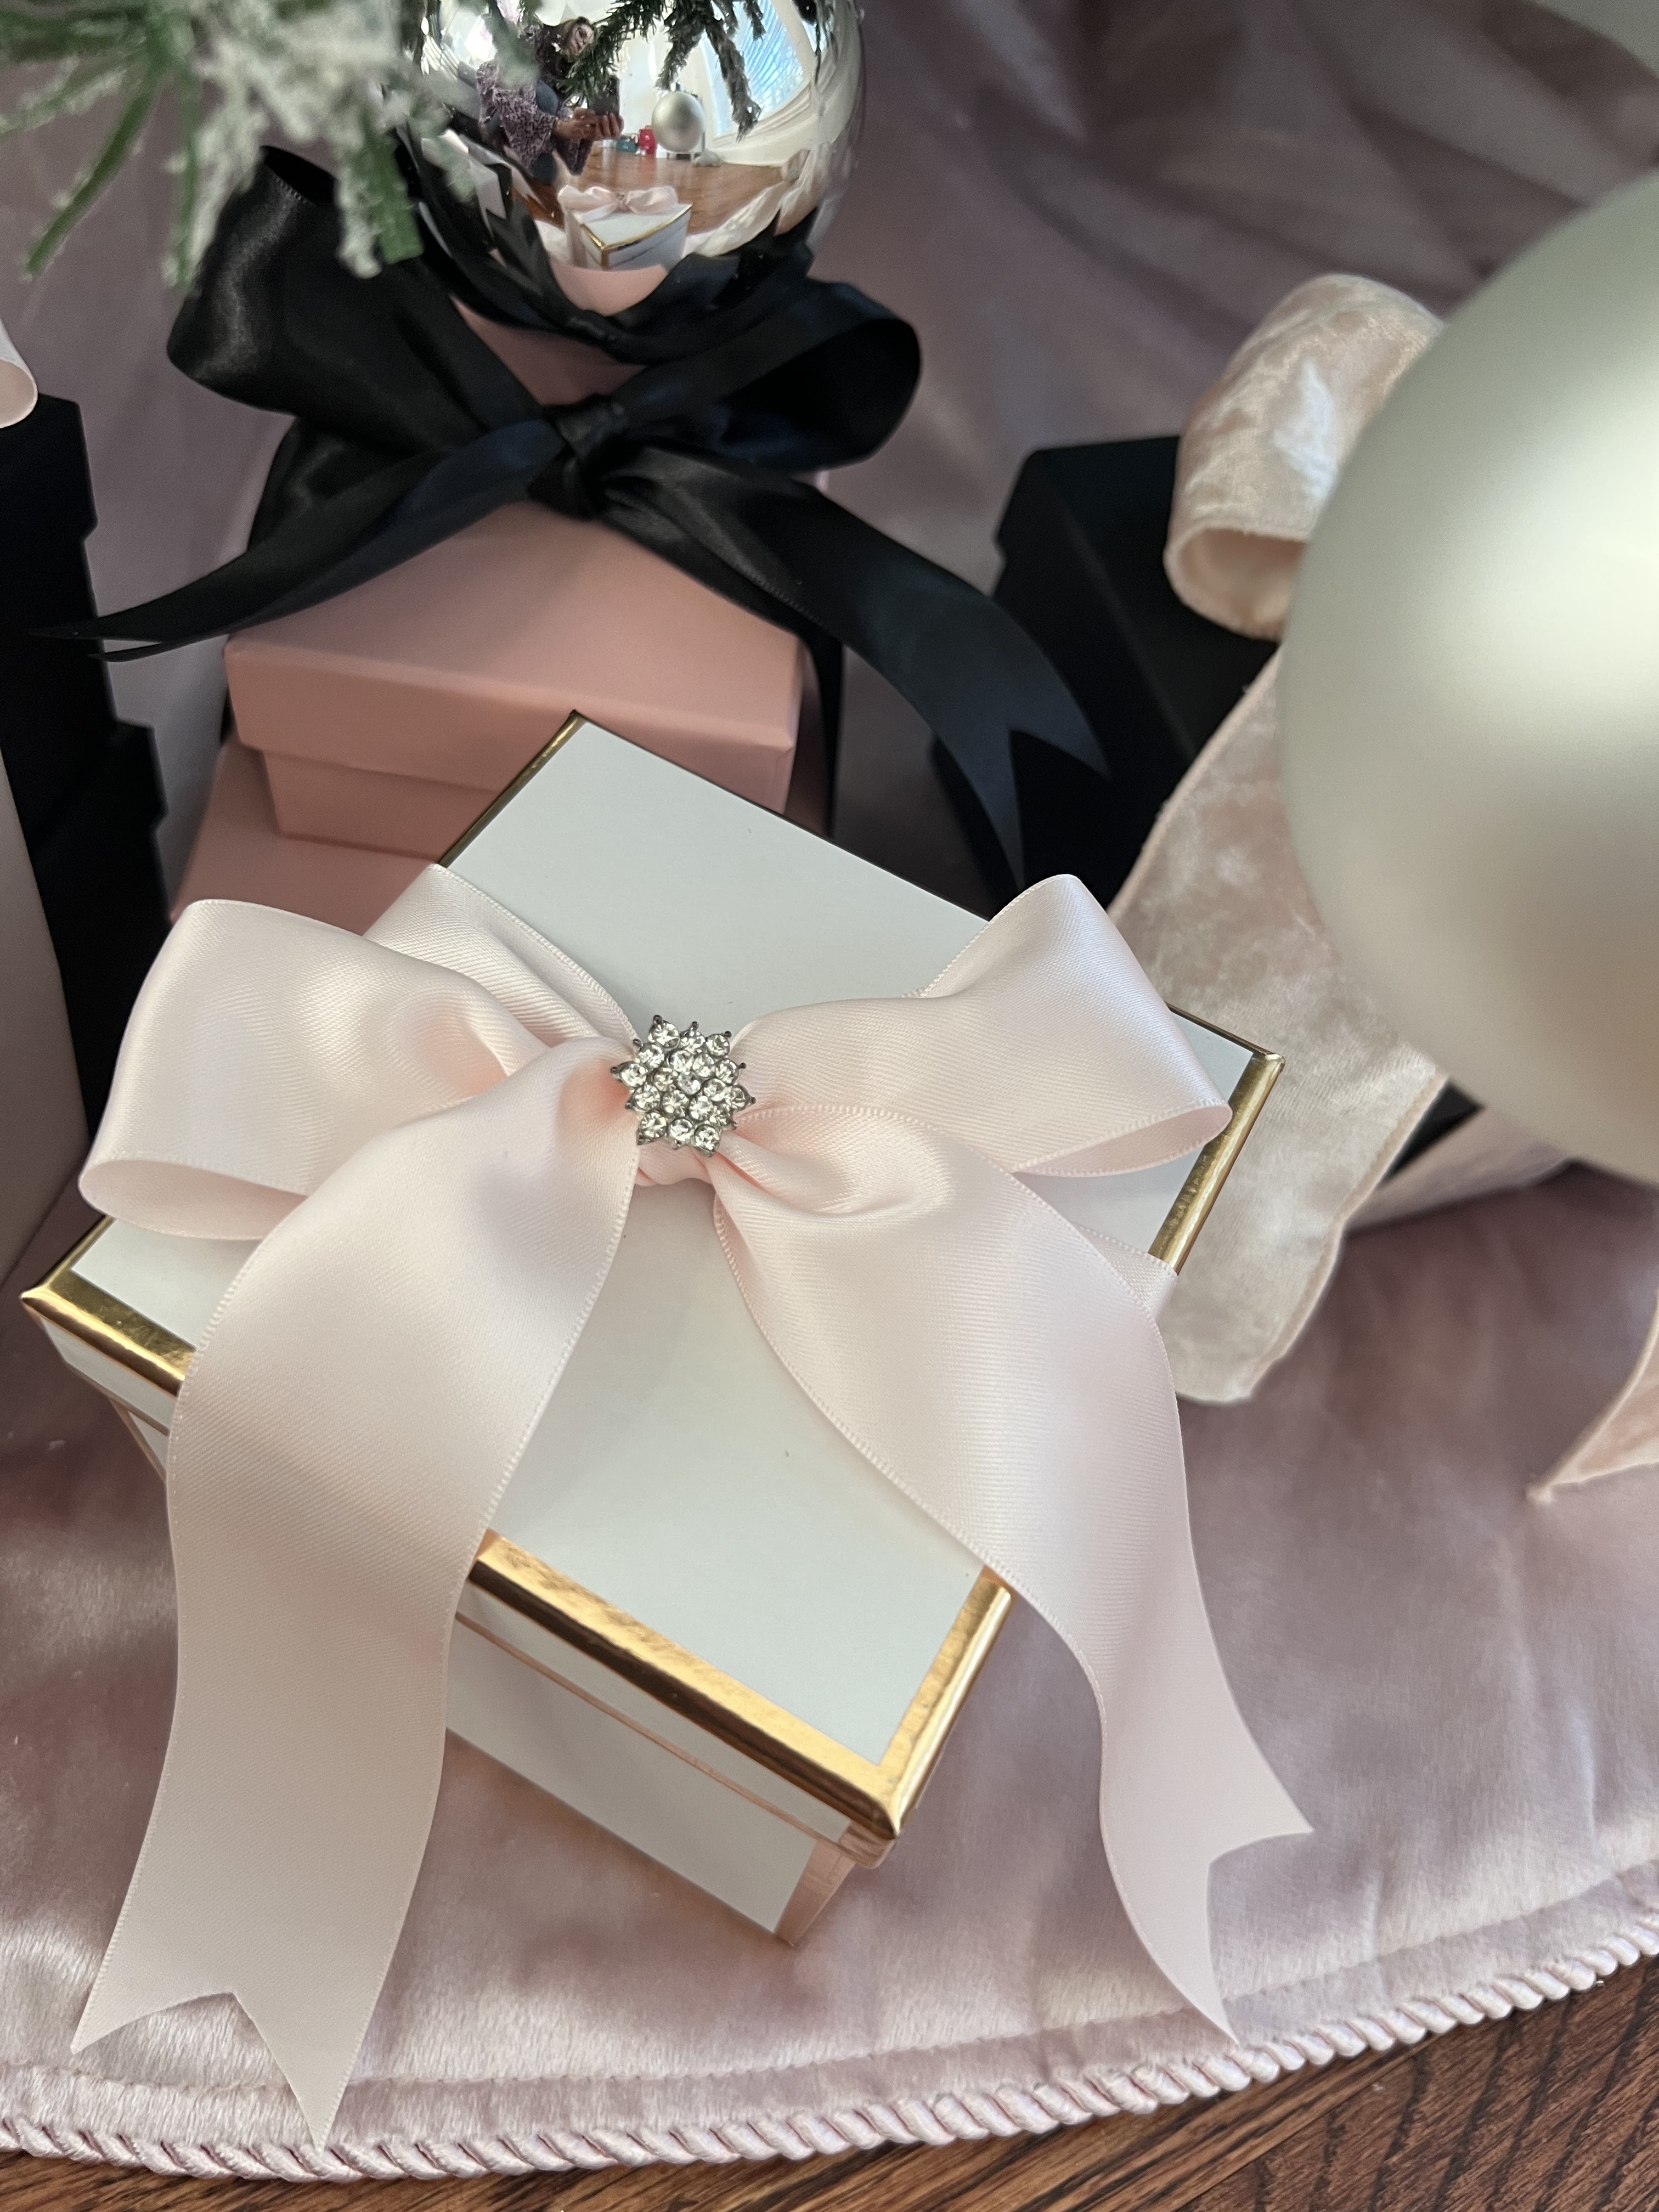


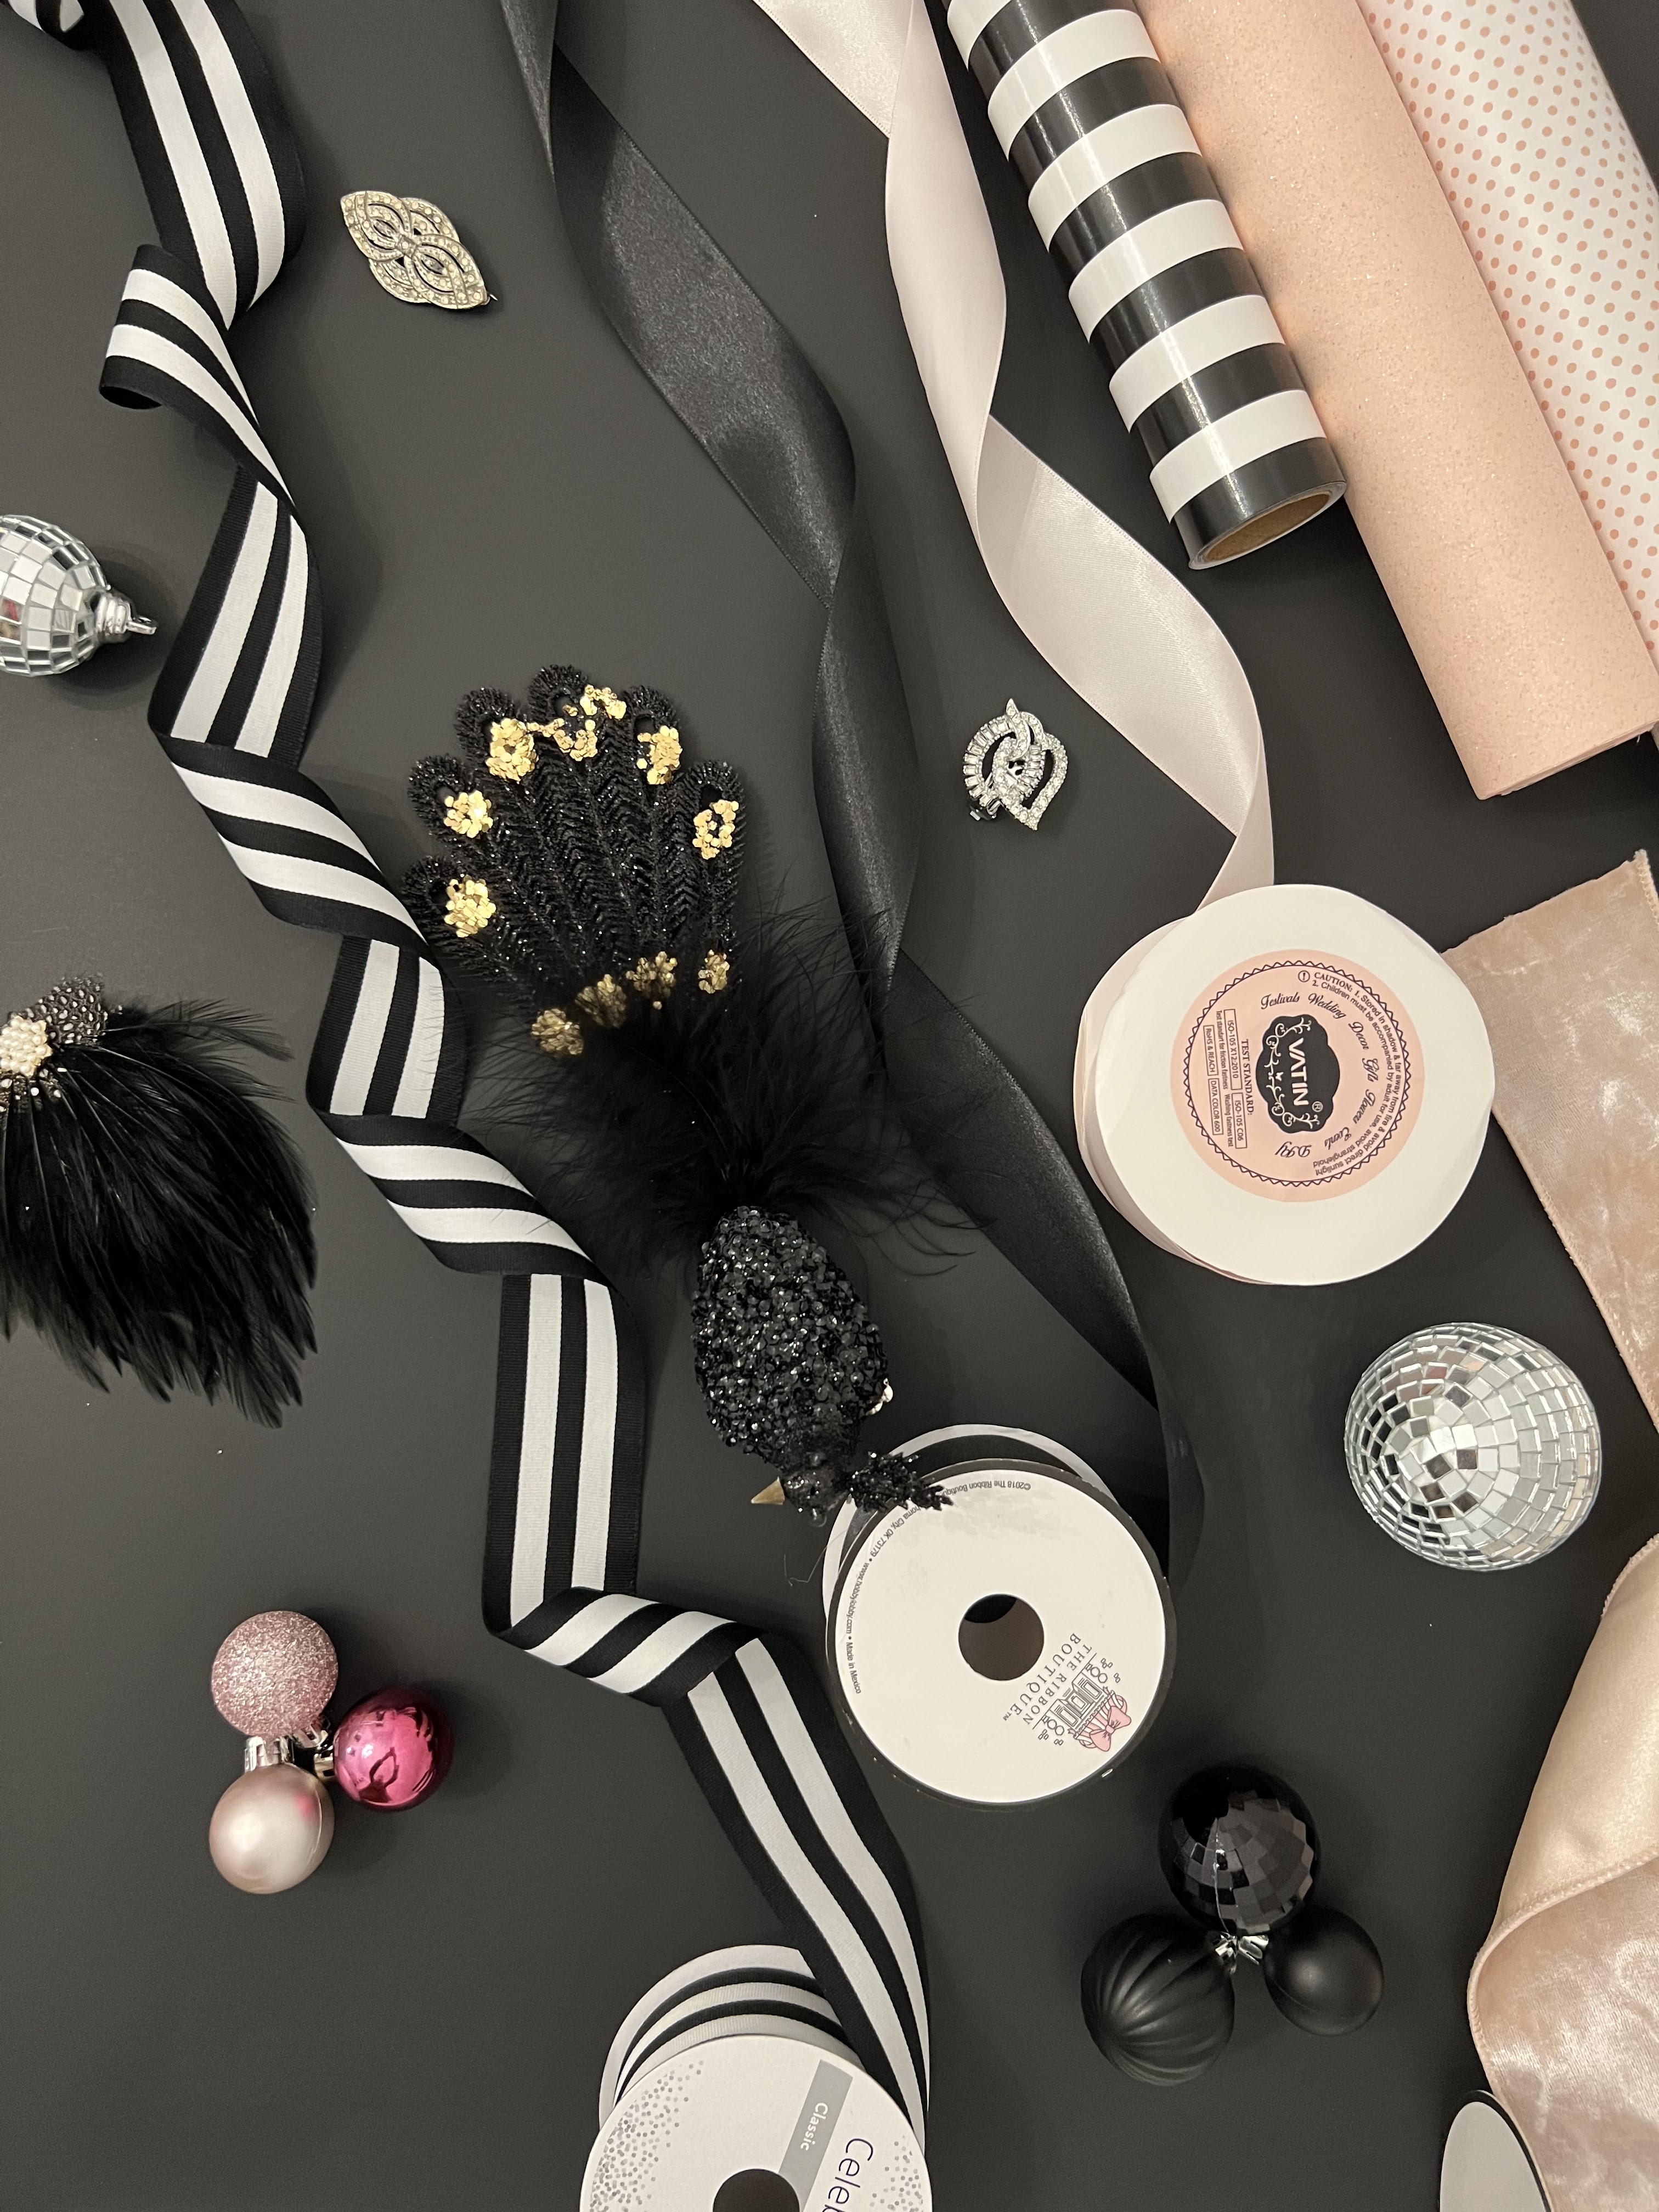
To create these beautifully wrapped gifts, I start with a few essentials. I choose my colors and purchase the wrapping paper {black, white with blush polka dots, a glitter blush and a black striped}; and ribbon - satin, velvet and striped in a variety of widths, textures and colors to match my theme; a selection of baubles, brooches, ornaments, flowers and any other decorations I can find to add to my gifts. 


 I always "shop" my house to see what I already have on hand before going shopping - this saves on time and money which is a BONUS in my book. I lay all of the elements out so I know what I have to work with. I shop all year for paper and ribbon {I may or may not have a slight obsession} so by the time Christmas comes, I usually have a variety to choose from. 


Once the gifts 
have been wrapped, you can mix and match ribbons and embellishments. This is the fun part, you can make it as fancy as you'd like or as simple, it's totally up to you, and what's even better? There is no right way or wrong way. I typically like a very simple bow so the decorative elements I choose, really stand out and sometimes a simple bow is all that is needed depending upon the paper you choose. 


Another option, if you are short on time, but still want a beautifully wrapped gift, is using the charming gift boxes in place of wrapping paper which still pairs well with your favorite ribbon and baubles. I used several black and blush pink stacking boxes, as well as white and gold ones under my tree, and I have to say I love the look of both the wrapped boxes as well as the colored gift boxes. 


I'm all about the presentation, it's nice to put the extra love and attention into something you are giving to a loved one or friend. A few years ago my mom gave me all of my grandmother's brooches, which I have used on a several of the gifts I given. 


I hope you have liked this post and will try embellishing your gifts in the future. 

Have a great Christmas season. 
  • Friday, December 09, 2022

DIY Glamorous Christmas Gifts


I get really excited this time of year to wrap all the gifts I purchased for my family and friends. I like to take the time to make each gift look special and pretty. 


My love for a beautifully wrapped gift started with my first job in high school. I worked for a high end department store in Denver, in their gift wrap center. I learned the very essence of gift wrapping, with embellishments, different textures and of course, how to make the edges of the gift crisp. 


As I’ve grown older, my fondness of gift wrapping has evolved. Black paper is one of my favorites as it is both, powerful and chic. The unexpected elements, such as vintage brooches, flowers, crystals, feathers and pearls, is what sets my gifts apart from any others. This year I went with a more glamorous Christmas theme, so I designed my gift wrapping accordingly. 


To create these beautifully wrapped gifts, I start with a few essentials. I choose my colors and purchase the wrapping paper {black, white with blush polka dots, a glitter blush and a black striped}; and ribbon - satin, velvet and striped in a variety of widths, textures and colors to match my theme; a selection of baubles, brooches, ornaments, flowers and any other decorations I can find to add to my gifts. 


 I always "shop" my house to see what I already have on hand before going shopping - this saves on time and money which is a BONUS in my book. I lay all of the elements out so I know what I have to work with. I shop all year for paper and ribbon {I may or may not have a slight obsession} so by the time Christmas comes, I usually have a variety to choose from. 
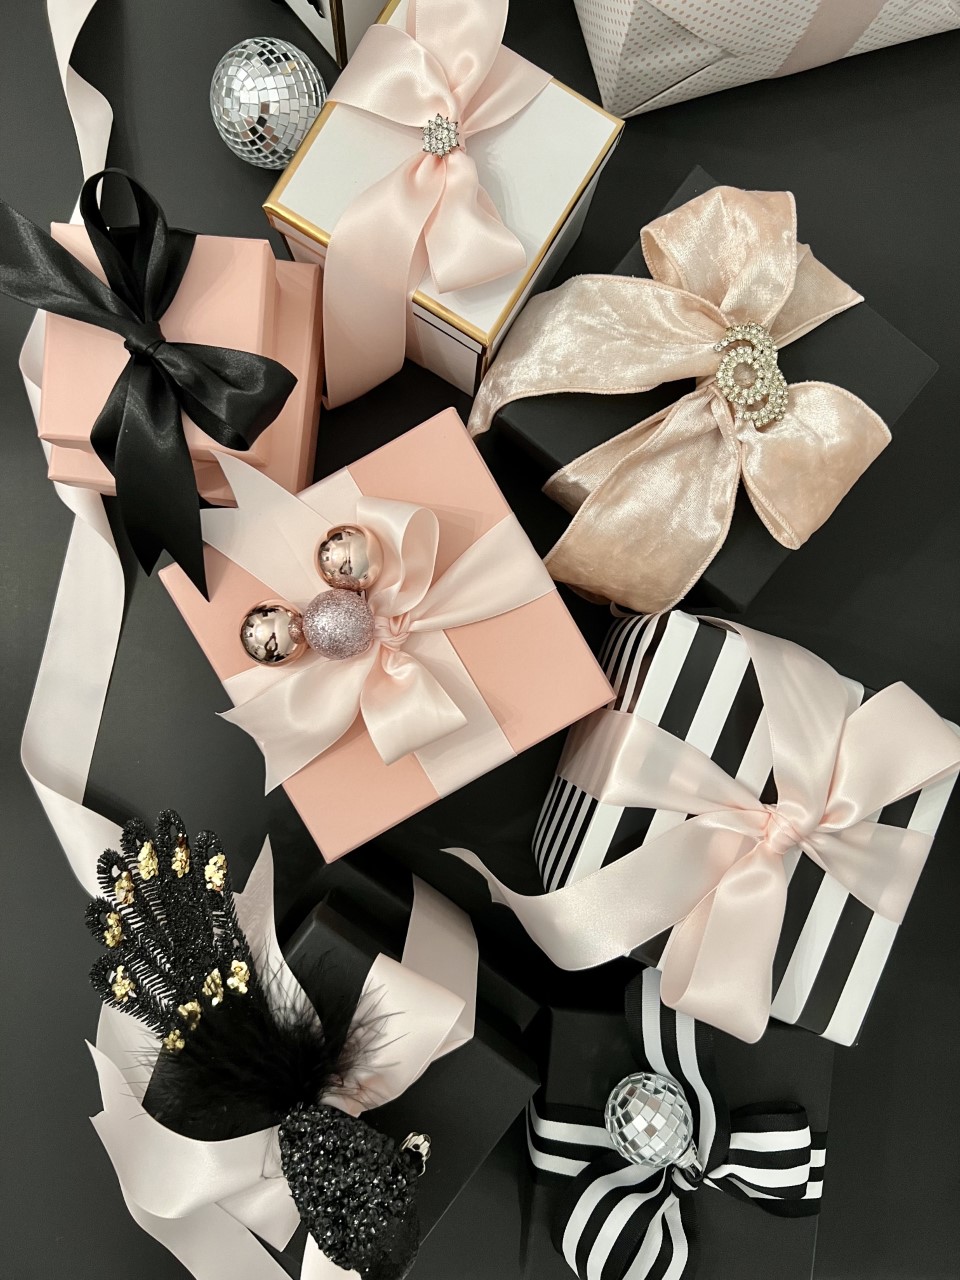


Once the gifts 
have been wrapped, you can mix and match ribbons and embellishments. This is the fun part, you can make it as fancy as you'd like or as simple, it's totally up to you, and what's even better? There is no right way or wrong way. I typically like a very simple bow so the decorative elements I choose, really stand out and sometimes a simple bow is all that is needed depending upon the paper you choose. 


Another option, if you are short on time, but still want a beautifully wrapped gift, is using the charming gift boxes in place of wrapping paper which still pairs well with your favorite ribbon and baubles. I used several black and blush pink stacking boxes, as well as white and gold ones under my tree, and I have to say I love the look of both the wrapped boxes as well as the colored gift boxes. 


I'm all about the presentation, it's nice to put the extra love and attention into something you are giving to a loved one or friend. A few years ago my mom gave me all of my grandmother's brooches, which I have used on a several of the gifts I given. 


I hope you have liked this post and will try embellishing your gifts in the future. 

Have a great Christmas season. 

This year we are staying in for New Year's Eve, but have invited friends over for a little cheer and to count down to the new year! This year has flown by so quick and I am very excited to see what the next year brings our way! But I know after a busy Christmas season planning a New Year's Eve party is the last thing we want to do! I am here with some great tips to help you plan your NYE party! 

When I plan a party, I always start with a color palette and go from there. I am seriously loving all the metallics this year, they just scream glam! You can see a party here, here, here, here and here all using metallic colors. So styling my NYE party is no different. Black and gold are pretty standard NYE party colors, but I incorporated green into the mix and LOVE it!  


I used the gold foil balloons from Northstar as my focal point and backdrop, a fun party hat was added to each end, to make the balloons a little more festive! As a backdrop, you simply move the bar cart out of the way and bust out your cell phone for a selfie! 


Party horns, balloons, confetti and glitter toppers all make this party celebration worthy! Not to mention a bar cart, it's like a party on wheels, am I right? This party essential is such a great item to have on hand. It allows your guests to "help themselves". Serve cupcakes, donuts, cookies, popcorn - anything your guests can grab and go! 


You know I love a good cupcake and cookie, but I love the ease of simple glazed donuts stacked on a pretty cake stand too! Using my Cricut, I cut out black, gold and green glitter toppers to mark this fun party! I am a big fan of store bought goodies that I can dress up with sprinkles, crushed candies, mini donuts and fun glitter toppers! It takes the stress out of having to order weeks in advance from a bakery. 


For the table, I love layering different sized plates to give dimension to the table and a more cohesive look. Instead of using place cards, I placed different cookies and party horns on each plate. The party horns were dressed up with a short strip of green feather boa and topped with a glitter bow, I created with my Cricut! I really do love that machine!


Each place setting not only had their own party horn and cookie, but also a party hat and mini favor box which held a delicious champagne truffle. Our guests had a mini party at the table. 


Instead of flowers or candles down the middle of the table, I opted for several 10" honeycomb balls, which I found at Target {my home away from home} in the colors of my choice.


At the ends of the table I laid out the Happy New Year banner I purchased at Target. I am excited to ring in the new year with friends, but I'm most excited how easy it was to plan this party and even though it looks like it took a lot of time, it really didn't! 

My tips to help you plan your NYE party:
  • One stop shopping ~ Decide what you want to serve at your party. Target and World Market carry pretty much everything you may need/want.
  • Make a list - shop online if you can. It will save you time and money. 
  • Buy as much of the food items pre-made, this will save you the most time and stress
  • Set up the day before your party. I always do this and it helps the stress level + I am OCD and need to have everything perfect! 
  • Attend your own party! This is the most important tip I can give you, enjoy your party! 

I hope our New Year's Eve party + tips inspired you to host your own! 

Happy New Year Friends! 

Cheers!

Remember to follow BellaGrey Designs on all your social media channels, you will find the links below this post! Exclusive coupon codes to our shop and free printables throughout the year are shared on our social media. If you like this post, sign up for weekly updates via email. It's FREE! See the sidebar for more information. 
  • Wednesday, December 20, 2017

New Year's Eve Party Celebration + Tips


This year we are staying in for New Year's Eve, but have invited friends over for a little cheer and to count down to the new year! This year has flown by so quick and I am very excited to see what the next year brings our way! But I know after a busy Christmas season planning a New Year's Eve party is the last thing we want to do! I am here with some great tips to help you plan your NYE party! 

When I plan a party, I always start with a color palette and go from there. I am seriously loving all the metallics this year, they just scream glam! You can see a party here, here, here, here and here all using metallic colors. So styling my NYE party is no different. Black and gold are pretty standard NYE party colors, but I incorporated green into the mix and LOVE it!  


I used the gold foil balloons from Northstar as my focal point and backdrop, a fun party hat was added to each end, to make the balloons a little more festive! As a backdrop, you simply move the bar cart out of the way and bust out your cell phone for a selfie! 


Party horns, balloons, confetti and glitter toppers all make this party celebration worthy! Not to mention a bar cart, it's like a party on wheels, am I right? This party essential is such a great item to have on hand. It allows your guests to "help themselves". Serve cupcakes, donuts, cookies, popcorn - anything your guests can grab and go! 


You know I love a good cupcake and cookie, but I love the ease of simple glazed donuts stacked on a pretty cake stand too! Using my Cricut, I cut out black, gold and green glitter toppers to mark this fun party! I am a big fan of store bought goodies that I can dress up with sprinkles, crushed candies, mini donuts and fun glitter toppers! It takes the stress out of having to order weeks in advance from a bakery. 


For the table, I love layering different sized plates to give dimension to the table and a more cohesive look. Instead of using place cards, I placed different cookies and party horns on each plate. The party horns were dressed up with a short strip of green feather boa and topped with a glitter bow, I created with my Cricut! I really do love that machine!


Each place setting not only had their own party horn and cookie, but also a party hat and mini favor box which held a delicious champagne truffle. Our guests had a mini party at the table. 


Instead of flowers or candles down the middle of the table, I opted for several 10" honeycomb balls, which I found at Target {my home away from home} in the colors of my choice.


At the ends of the table I laid out the Happy New Year banner I purchased at Target. I am excited to ring in the new year with friends, but I'm most excited how easy it was to plan this party and even though it looks like it took a lot of time, it really didn't! 

My tips to help you plan your NYE party:
  • One stop shopping ~ Decide what you want to serve at your party. Target and World Market carry pretty much everything you may need/want.
  • Make a list - shop online if you can. It will save you time and money. 
  • Buy as much of the food items pre-made, this will save you the most time and stress
  • Set up the day before your party. I always do this and it helps the stress level + I am OCD and need to have everything perfect! 
  • Attend your own party! This is the most important tip I can give you, enjoy your party! 

I hope our New Year's Eve party + tips inspired you to host your own! 

Happy New Year Friends! 

Cheers!

Remember to follow BellaGrey Designs on all your social media channels, you will find the links below this post! Exclusive coupon codes to our shop and free printables throughout the year are shared on our social media. If you like this post, sign up for weekly updates via email. It's FREE! See the sidebar for more information. 

I'm excited to share the swanky soiree I designed and styled this year for my daughter's 9th birthday! Glitz and Glam were all a part of this fabulous Dress to the 9s Fashion Fete! Everywhere you looked there was glitter, gold, stripes, hot pink, polka dots and black. Perfectly fit for a girl who loves fashion and everything glitter. 


The invitation helps set the stage for a fabulous party. This one, was no exception. We love how the silhouette came out on the back with one of my daughter's favorite quotes. 


Dressed up throw pillows were a perfectly glamorous fit for this party. 


One of my favorite details of the party ~ the catwalk, which "modeled" the beautiful cookies by our sweet friend Bethany of Auntie Bea's Bakery. But wait, the catwalk was lit at night to show off those beautiful creations. The girls squealed with delight when they saw the catwalk with the most delicious cookies!
Can I just tell you, I was so excited when this vision became a reality and oh, those cute chairs! What a fabulous addition.  I knew I wanted hot pink chairs but was having a tough time finding just the "perfect" ones to line the catwalk, so I designed them! Yep, I created those super cute minis. They will be available in our shop soon. 


Was I right? Isn't the wonderful? The catwalk was lit up just like the real ones in NYC and it made the biggest impact for the dessert table. 


Everything flowed perfectly from the decor to the desserts to the girls party outfits. 


Our sweet friend, Andrea of Paper+Pop made my vision come true with this double layer name cake topper ~ LOVE the mini velvet bow! 


Every girl deserves a designer clutch complete with a rhinestone, don't you agree?


The table is topped with black leather, which set the tone for the party theme. Large painted mason jars with fluffy hot pink peonies serve as the centerpiece. Each plate is topped with a mini frame with the girls name in it. Each place setting had a hot pink flower plate charger as a base topped with a black dinner plate and a striped salad plate. One of my favorite parts of this design are the glittered mini sparkling cider bottles {tutorial coming soon}, in the colors of the party paired with a champagne glass. Each glass rimmed with edible glitter and topped with a black striped straw and a mini gold bow. 


Each guest had a glitter bodice embellished glassine bag with designer utensils inside, along their place setting, keeping with the theme.


The chandelier was adorned with multiple colors of paper lanterns to raise the eye and create the party atmosphere. 


The chairs were covered in black and dressed up with black and white striped or hot pink ribbon. 


The stage was set for the girls to make their appearance on the catwalk. They created their own outfits using scraps of fabric and ribbon held together with hot glue or decorative duck tape. 


There were hair and make-up stations and now they are almost ready for their modeling debut. 


Can't have a style show without boas and beautiful jewelry. 


All the models had so much fun creating their very own designs for the style show and were more than happy to show them off to the audience.  

The models had built up an appetite and quickly returned in their party dresses. 


The birthday girl was having a great time and what a true fashionista she is! 


All of her friends "Dressed to the 9s" to help her celebrate.


I'm not sure which the girls loved more, the ice cream or that it was served in champagne glasses with sprinkles the colors of the party! 


As party favors, I purchased notebooks and created five different vinyl decals to embellish each book with along with a great pom pom pen. The girls could not wait to start writing in them about the party. 


Aren't these pens the cutest? 

A HUGE thank you to all of our vendor friends who helped make this Fashion Party, glamourous! 


Styling/Design |  Jennifer Kirlin, BellaGrey♥Designs
Printable Paper Designs | BellaGrey♥Designs
Model Images | Kori Clark Design
Gold Glitter Vinyl |  Creative Designs by Toni
Gold Cake Pops | Sparkling Sweets Boutique
Cake Topper & Mini Gold Bows | Paper + Pop
Tassel Garland, Mini Favor Boxes, Candles | Fancy That
Paper Lanterns, Rock Candy, Boas | Oriental Trading
Painted Glitter Mason Jars | Always the Occasion
Glitter Pom Pom Toppers | Fizzy Party
Glitter Shimmer Sticks | Made by a Princess
GLAM Candy Dishes | Hoopla Events
White and Black Honeycomb Balls | Celebration Lane
Black and White Paper Lanterns | Shop Sweet Lulu
Candy Wands and Pinata | Handcrafted Parties
Custom Confetti | The Confetti Bar
SPARKLE Letters | Hobby Lobby


  • Friday, August 28, 2015

Dress to the 9s Fashion Runway Birthday Party


I'm excited to share the swanky soiree I designed and styled this year for my daughter's 9th birthday! Glitz and Glam were all a part of this fabulous Dress to the 9s Fashion Fete! Everywhere you looked there was glitter, gold, stripes, hot pink, polka dots and black. Perfectly fit for a girl who loves fashion and everything glitter. 


The invitation helps set the stage for a fabulous party. This one, was no exception. We love how the silhouette came out on the back with one of my daughter's favorite quotes. 


Dressed up throw pillows were a perfectly glamorous fit for this party. 


One of my favorite details of the party ~ the catwalk, which "modeled" the beautiful cookies by our sweet friend Bethany of Auntie Bea's Bakery. But wait, the catwalk was lit at night to show off those beautiful creations. The girls squealed with delight when they saw the catwalk with the most delicious cookies!
Can I just tell you, I was so excited when this vision became a reality and oh, those cute chairs! What a fabulous addition.  I knew I wanted hot pink chairs but was having a tough time finding just the "perfect" ones to line the catwalk, so I designed them! Yep, I created those super cute minis. They will be available in our shop soon. 


Was I right? Isn't the wonderful? The catwalk was lit up just like the real ones in NYC and it made the biggest impact for the dessert table. 


Everything flowed perfectly from the decor to the desserts to the girls party outfits. 


Our sweet friend, Andrea of Paper+Pop made my vision come true with this double layer name cake topper ~ LOVE the mini velvet bow! 


Every girl deserves a designer clutch complete with a rhinestone, don't you agree?


The table is topped with black leather, which set the tone for the party theme. Large painted mason jars with fluffy hot pink peonies serve as the centerpiece. Each plate is topped with a mini frame with the girls name in it. Each place setting had a hot pink flower plate charger as a base topped with a black dinner plate and a striped salad plate. One of my favorite parts of this design are the glittered mini sparkling cider bottles {tutorial coming soon}, in the colors of the party paired with a champagne glass. Each glass rimmed with edible glitter and topped with a black striped straw and a mini gold bow. 


Each guest had a glitter bodice embellished glassine bag with designer utensils inside, along their place setting, keeping with the theme.


The chandelier was adorned with multiple colors of paper lanterns to raise the eye and create the party atmosphere. 


The chairs were covered in black and dressed up with black and white striped or hot pink ribbon. 


The stage was set for the girls to make their appearance on the catwalk. They created their own outfits using scraps of fabric and ribbon held together with hot glue or decorative duck tape. 


There were hair and make-up stations and now they are almost ready for their modeling debut. 


Can't have a style show without boas and beautiful jewelry. 


All the models had so much fun creating their very own designs for the style show and were more than happy to show them off to the audience.  

The models had built up an appetite and quickly returned in their party dresses. 


The birthday girl was having a great time and what a true fashionista she is! 


All of her friends "Dressed to the 9s" to help her celebrate.


I'm not sure which the girls loved more, the ice cream or that it was served in champagne glasses with sprinkles the colors of the party! 


As party favors, I purchased notebooks and created five different vinyl decals to embellish each book with along with a great pom pom pen. The girls could not wait to start writing in them about the party. 


Aren't these pens the cutest? 

A HUGE thank you to all of our vendor friends who helped make this Fashion Party, glamourous! 


Styling/Design |  Jennifer Kirlin, BellaGrey♥Designs
Printable Paper Designs | BellaGrey♥Designs
Model Images | Kori Clark Design
Gold Glitter Vinyl |  Creative Designs by Toni
Gold Cake Pops | Sparkling Sweets Boutique
Cake Topper & Mini Gold Bows | Paper + Pop
Tassel Garland, Mini Favor Boxes, Candles | Fancy That
Paper Lanterns, Rock Candy, Boas | Oriental Trading
Painted Glitter Mason Jars | Always the Occasion
Glitter Pom Pom Toppers | Fizzy Party
Glitter Shimmer Sticks | Made by a Princess
GLAM Candy Dishes | Hoopla Events
White and Black Honeycomb Balls | Celebration Lane
Black and White Paper Lanterns | Shop Sweet Lulu
Candy Wands and Pinata | Handcrafted Parties
Custom Confetti | The Confetti Bar
SPARKLE Letters | Hobby Lobby


Christmas Gift Wrap Ideas

I'm super excited to team up with a few of my blogger friends to bring you some great Christmas gift wrap ideas. Welcome to everyone vis...

Meet Jennifer

Meet Jennifer
God made and Jesus saved! This Colorado girl is living in a Texas world. I'm a home decor enthusiast, sharing our home, fashion and entertaining tips.

My Favorites

Recommendations

@Instagram