BellaGrey Designs: Pier 1
Pier 1

How in the world is it almost Thanksgiving? It's like once Halloween is over the rest of the year flies by! We are literally days away from THANKSGIVING!

But please don't panic, I am here help you navigate through the next few days with some Thanksgiving inspiration! Do you remember earlier in the month, I had a mini styling event with Pier 1? What I didn't share with you was my beautiful Thanksgiving tablescape ~ you can find everything on this table at Pier 1! If you follow me on Instagram, you may have seen a sneak peek.


I am pretty sure a beautifully set table makes the food taste better and sets the tone for the upcoming meal! Am I alone in this statement? The formal dining room is the first room you see as you enter my home, and as such, I take great pride in always having a beautiful tablescape. 


If you want to step up your game, take cues from the changing leaves on the trees this Fall. When styling this tablescape, I did just that by bringing in the classic hues and using a mixture of textures such as the tobacco brown dining table, matching rattan charger, gold of this lotus charger, the teal rimmed plates and the colorful salad plates to provide depth!


Keep things simple and cohesive, by repeating the same elements throughout the table, it creates a sense of fullness. I did this with the pumpkins and candles, which provided a dimensional feel. 


Think about what you want as your focal point. I designed the centerpiece first, then I thought about the type of tone I wanted to set for this table. Instead of layering the foundation with fabrics, such as table linens or placemats, I chose a neutral colored runner. The contrast between the textures provides a balance to the table.


I like to incorporate varying heights throughout my table, without obstructing conversation and adding simple elements to each place setting shows your attention to detail. 

This table is now perfect for a harvest gathering of friends and family! My hope is I inspired you to create a new beautiful Thanksgiving table this season. 

Happy Thanksgiving friends! 

Remember to follow BellaGrey Designs on all your social media channels, you will find the links below this post! Exclusive coupon codes to our shop and free printables throughout the year are shared on our social media. If you like this post, sign up for weekly updates via email. It's FREE! See the sidebar for more information. 

Falling into Fall with a Beautiful Thanksgiving Tablescape


How in the world is it almost Thanksgiving? It's like once Halloween is over the rest of the year flies by! We are literally days away from THANKSGIVING!

But please don't panic, I am here help you navigate through the next few days with some Thanksgiving inspiration! Do you remember earlier in the month, I had a mini styling event with Pier 1? What I didn't share with you was my beautiful Thanksgiving tablescape ~ you can find everything on this table at Pier 1! If you follow me on Instagram, you may have seen a sneak peek.


I am pretty sure a beautifully set table makes the food taste better and sets the tone for the upcoming meal! Am I alone in this statement? The formal dining room is the first room you see as you enter my home, and as such, I take great pride in always having a beautiful tablescape. 


If you want to step up your game, take cues from the changing leaves on the trees this Fall. When styling this tablescape, I did just that by bringing in the classic hues and using a mixture of textures such as the tobacco brown dining table, matching rattan charger, gold of this lotus charger, the teal rimmed plates and the colorful salad plates to provide depth!


Keep things simple and cohesive, by repeating the same elements throughout the table, it creates a sense of fullness. I did this with the pumpkins and candles, which provided a dimensional feel. 


Think about what you want as your focal point. I designed the centerpiece first, then I thought about the type of tone I wanted to set for this table. Instead of layering the foundation with fabrics, such as table linens or placemats, I chose a neutral colored runner. The contrast between the textures provides a balance to the table.


I like to incorporate varying heights throughout my table, without obstructing conversation and adding simple elements to each place setting shows your attention to detail. 

This table is now perfect for a harvest gathering of friends and family! My hope is I inspired you to create a new beautiful Thanksgiving table this season. 

Happy Thanksgiving friends! 

Remember to follow BellaGrey Designs on all your social media channels, you will find the links below this post! Exclusive coupon codes to our shop and free printables throughout the year are shared on our social media. If you like this post, sign up for weekly updates via email. It's FREE! See the sidebar for more information. 
Hello friends! It's the most wonderful time of the year! It is filled with cold weather, snowflakes, fun festivities and hot drinks to keep you warm! Today, I will share styling ideas on how to create your own Hot Cocoa Bar!

Affiliate links are included in this post, which means if you make a purchase using one of the links, I will earn a small commission, but it will not cost you one penny! But it does help to keep my website running. Thank you! The following is based strictly on my honest opinion. I only recommend products and brands I love and use personally. 

This past weekend I took part in a mini styling event with Pier 1, where I styled not only this hot cocoa bar but a Christmas tree three ways! It was a great event and I had so much fun! If you are local to Las Colinas Texas, I would love for you to stop by one of my styling events. I may have another one this month, but I know for sure I will have one in December! I will keep you posted!

Now, let's start styling your hot cocoa bar!

  • You will need some sort of table or counter to display your hot cocoa bar. I chose this buffet table and layered it with a classic red buffalo check table runner. I pulled out the drawers, lined them with the tartan plaid placemats and placed the mugs and thermal cups inside. This gave me more table top space for my condiments and hot cocoa necessities!
  • Add some festive decor such as mini Christmas trees, reindeer, candles, signage and Christmas ornaments, to pull the look together! 

I am loving how it's turning out so far! It gives me all the cold weather winter feelings! Like snuggling in front of the fireplace!

  • Include some type of stirrer, whether it be spoons, stir sticks or festive these paper straws. I placed them in this fabulous red wagon server to tie it all together! 

  • Adding decorative cup sleeves to your thermal cups make them cheerful and theme ready! You can find these in the shop! They come in two different fonts and backgrounds. 


  • Don't forget your signage! This printable large sign is perfect for your Hot Cocoa Bar, you can purchase it in the shop and it comes as an instant download! 
Now you are ready to invite your friends and family over to enjoy a cup of Hot Cocoa! If you would like to see other Hot Cocoa Bars I have styled click here, here, here and here


Looking for a delicious Hot Cocoa recipe? Try this one out! I promise, you will NOT be disappointed! 

I hope I have inspired you to style your own Hot Cocoa Bar! If you decide to style one, I would love to see photos, please share them with me!

Cheers!

Remember to follow BellaGrey Designs on all your social media channels, you will find the links below this post! Exclusive coupon codes to our shop and free printables throughout the year are shared on our social media. If you like this post, sign up for weekly updates via email. It's FREE! See the sidebar for more information.


Pin it for later

How to style a Hot Cocoa Bar

Hello friends! It's the most wonderful time of the year! It is filled with cold weather, snowflakes, fun festivities and hot drinks to keep you warm! Today, I will share styling ideas on how to create your own Hot Cocoa Bar!

Affiliate links are included in this post, which means if you make a purchase using one of the links, I will earn a small commission, but it will not cost you one penny! But it does help to keep my website running. Thank you! The following is based strictly on my honest opinion. I only recommend products and brands I love and use personally. 

This past weekend I took part in a mini styling event with Pier 1, where I styled not only this hot cocoa bar but a Christmas tree three ways! It was a great event and I had so much fun! If you are local to Las Colinas Texas, I would love for you to stop by one of my styling events. I may have another one this month, but I know for sure I will have one in December! I will keep you posted!

Now, let's start styling your hot cocoa bar!

  • You will need some sort of table or counter to display your hot cocoa bar. I chose this buffet table and layered it with a classic red buffalo check table runner. I pulled out the drawers, lined them with the tartan plaid placemats and placed the mugs and thermal cups inside. This gave me more table top space for my condiments and hot cocoa necessities!
  • Add some festive decor such as mini Christmas trees, reindeer, candles, signage and Christmas ornaments, to pull the look together! 

I am loving how it's turning out so far! It gives me all the cold weather winter feelings! Like snuggling in front of the fireplace!

  • Include some type of stirrer, whether it be spoons, stir sticks or festive these paper straws. I placed them in this fabulous red wagon server to tie it all together! 

  • Adding decorative cup sleeves to your thermal cups make them cheerful and theme ready! You can find these in the shop! They come in two different fonts and backgrounds. 


  • Don't forget your signage! This printable large sign is perfect for your Hot Cocoa Bar, you can purchase it in the shop and it comes as an instant download! 
Now you are ready to invite your friends and family over to enjoy a cup of Hot Cocoa! If you would like to see other Hot Cocoa Bars I have styled click here, here, here and here


Looking for a delicious Hot Cocoa recipe? Try this one out! I promise, you will NOT be disappointed! 

I hope I have inspired you to style your own Hot Cocoa Bar! If you decide to style one, I would love to see photos, please share them with me!

Cheers!

Remember to follow BellaGrey Designs on all your social media channels, you will find the links below this post! Exclusive coupon codes to our shop and free printables throughout the year are shared on our social media. If you like this post, sign up for weekly updates via email. It's FREE! See the sidebar for more information.


Pin it for later
Hello friends! As many of you know, I have had the chance to partner with Pier 1 as their guest stylist and have enjoyed this opportunity to the fullest! This past weekend, I styled a Christmas tree three ways and their hot cocoa bar! I could not have enjoyed it more, as I was fully encompassed in my element and absolutely loved answering questions from the guests who showed up to my mini styling event!

Affiliate links are included in this post, which means if you make a purchase using one of the links, I will earn a small commission, but it will not cost you one penny! But it does help to keep my website running. Thank you! The following is based strictly on my honest opinion. I only recommend products and brands I love and use personally. 

Helping people make their tables {Christmas trees, hot cocoa bars, bar carts, etc.} beautiful for them and their guests is what makes me happy! Please let me know if you'd like me to help you learn to entertain in style!

The tree I styled was this 6'5" two tone slim LED Pre-lit Christmas tree. It was so easy to put together and decorate!


When I style a pre-lit tree, I like to add additional strings of lights. For this particular tree, I would add no more than three additional strings. I like my tree twinkling and bright. On a side note, aren't the faux fur gift box set so gorgeous? 


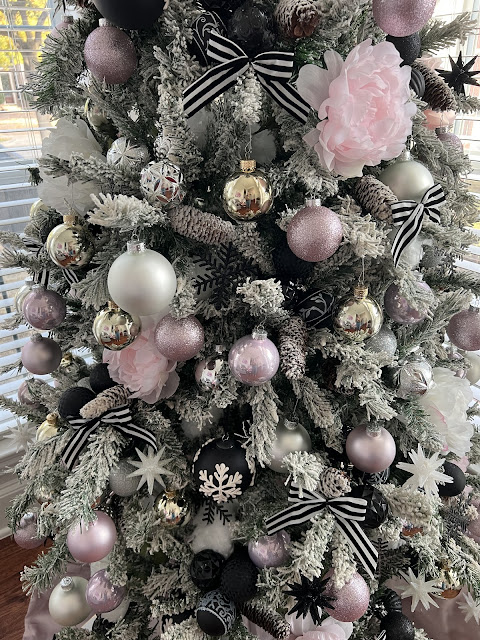
I made use of the floral stems Pier 1 has in stock for the Christmas season. I tucked the tall red berry stems, faux greenery bundle, jingle bell ornaments, white faux fur garland and pine cone and berry stems through out this side of the tree, remember I decorated this tree three different ways!


The second theme I designed was for the animal lovers out there! I adore these soft fluffy owls. I placed a large owl at the top of the tree and to balance it out, I added several smaller ones along with pinecone ornaments and lily of the valley stems.


Succulents are so popular right now, so for this side I used succulents, white snowballs and white branch picks. Although it was a lot green, it looked really pretty with the white accents.

Here are the basic tree trimming tips I use:

  • Pick your tree {whether it be real or faux}
  • Fluff your tree so the branches are the way you want them and the tree looks full
  • Pick your color scheme
  • String additional lights if you want added twinkle and an instant WOW factor!
  • Place your garland {ribbon, fur, greenery, tinsel, netting}on the tree if your are using it. Start from the top and work your way down or wrap it around the tree. I like to use ribbon and netting and cut smaller sections and tuck it in between the branches. 
  • Add large items {stuffed animals, lanterns, plates, sleds} first and make sure they are secure and will not pull your tree over
  • Start adding smaller ornaments or décor. Keeping it even throughout your tree. 
  • Use floral stems, it will not only add texture and interest to your tree, but will hide the bare spots ~ in my book that is a win-win!
  • Finish the look with your tree skirt and topper
Now you are ready to sit back and soak in all the beauty you just created with a large cup of hot cocoa!


Speaking of hot cocoa, here is a sneak peek of the hot cocoa bar I styled for Pier 1. I will be creating a entire post just on this bar alone, so make sure you come back and visit often!

I hope you are inspired by one of the three tree styled and I shared with you! I would love to see your tree, so please share it with me! 

Remember to follow BellaGrey Designs on all your social media channels, you will find the links below this post! Exclusive coupon codes to our shop and free printables throughout the year are shared on our social media. If you like this post, sign up for weekly updates via email. It's FREE! See the sidebar for more information. 

Tree Trimming Tips with BellaGrey Designs and Pier 1 this Christmas Season

Hello friends! As many of you know, I have had the chance to partner with Pier 1 as their guest stylist and have enjoyed this opportunity to the fullest! This past weekend, I styled a Christmas tree three ways and their hot cocoa bar! I could not have enjoyed it more, as I was fully encompassed in my element and absolutely loved answering questions from the guests who showed up to my mini styling event!

Affiliate links are included in this post, which means if you make a purchase using one of the links, I will earn a small commission, but it will not cost you one penny! But it does help to keep my website running. Thank you! The following is based strictly on my honest opinion. I only recommend products and brands I love and use personally. 

Helping people make their tables {Christmas trees, hot cocoa bars, bar carts, etc.} beautiful for them and their guests is what makes me happy! Please let me know if you'd like me to help you learn to entertain in style!

The tree I styled was this 6'5" two tone slim LED Pre-lit Christmas tree. It was so easy to put together and decorate!


When I style a pre-lit tree, I like to add additional strings of lights. For this particular tree, I would add no more than three additional strings. I like my tree twinkling and bright. On a side note, aren't the faux fur gift box set so gorgeous? 


I made use of the floral stems Pier 1 has in stock for the Christmas season. I tucked the tall red berry stems, faux greenery bundle, jingle bell ornaments, white faux fur garland and pine cone and berry stems through out this side of the tree, remember I decorated this tree three different ways!


The second theme I designed was for the animal lovers out there! I adore these soft fluffy owls. I placed a large owl at the top of the tree and to balance it out, I added several smaller ones along with pinecone ornaments and lily of the valley stems.


Succulents are so popular right now, so for this side I used succulents, white snowballs and white branch picks. Although it was a lot green, it looked really pretty with the white accents.

Here are the basic tree trimming tips I use:

  • Pick your tree {whether it be real or faux}
  • Fluff your tree so the branches are the way you want them and the tree looks full
  • Pick your color scheme
  • String additional lights if you want added twinkle and an instant WOW factor!
  • Place your garland {ribbon, fur, greenery, tinsel, netting}on the tree if your are using it. Start from the top and work your way down or wrap it around the tree. I like to use ribbon and netting and cut smaller sections and tuck it in between the branches. 
  • Add large items {stuffed animals, lanterns, plates, sleds} first and make sure they are secure and will not pull your tree over
  • Start adding smaller ornaments or décor. Keeping it even throughout your tree. 
  • Use floral stems, it will not only add texture and interest to your tree, but will hide the bare spots ~ in my book that is a win-win!
  • Finish the look with your tree skirt and topper
Now you are ready to sit back and soak in all the beauty you just created with a large cup of hot cocoa!


Speaking of hot cocoa, here is a sneak peek of the hot cocoa bar I styled for Pier 1. I will be creating a entire post just on this bar alone, so make sure you come back and visit often!

I hope you are inspired by one of the three tree styled and I shared with you! I would love to see your tree, so please share it with me! 

Remember to follow BellaGrey Designs on all your social media channels, you will find the links below this post! Exclusive coupon codes to our shop and free printables throughout the year are shared on our social media. If you like this post, sign up for weekly updates via email. It's FREE! See the sidebar for more information. 
 Affiliate links are included in this post, which means if you make a purchase using one of the links, I will earn a small commission, but it will not cost you one penny! But it does help to keep my website running. Thank you! The following is based strictly on my honest opinion. I only recommend products and brands I love and use personally. 

This past weekend, I had the pleasure of being the guest stylist once again at my local Pier 1. I styled 1 bar cart 3 ways for a fun Halloween style event.


Since Halloween is "traditionally" orange and black I styled one to please those senses! While I do like the traditional colors, I LOVE stepping outside of the box and styling with very "untraditional" colors and items!!

Its totally OK if you don't have a bar cart, I styled this simple grey accent table as a bar cart and BONUS it has wheels for easy transport and for a party on the go!!! OMGEEEE, how darn fabulous are those copper pumpkin tumblers??! I absolutely love them and how about the mini copper Moscow mule mugs {they are actually ornaments, but I would use them as shot glasses}! Add a few Halloween elements such as these yoga skeletons, a Wicked pillow, glitter pumpkins and my Frightful banner {you can find that in my shop} you have a great bar cart alternative!


I love the mystical colors and feel of this Celestial  bar cart I styled and added the Witchin' Good Time invitation as well, you can see more of the Witchin' Good Time party here. Using this color palette, you could leave this bar cart "dressed" this way for Fall, removing all the mini pumpkins if you would like. This particular themed cart would be magically beautiful for a frightful evening party!

I love pulling out my bar cart and all of my pretty glassware, when I have my girlfriends over. This Silver and Blush bar cart works anytime of year and for any occasion - Halloween, Christmas, Girls Night In, Baby/Bridal Shower and Brunch.


Don't be afraid to "shop" your house for items to place on the bar cart. As you can see I used a blush pink hurricane candle holder as my wine bucket and the modern silver long bowl as a decorative element on the bottom shelf, along with petite glass pumpkins! Most people don't have a set of 10 matching glasses, not to fret, mix and match them! It will look like you did it on purpose and no one will ever know. The mixture of metals is also a great design element, so mix and match away! However you decide to style your bar cart, just have fun with it!


The Boos and Booze invitation is new to my shop this year! There is still time to plan and throw your Halloween Soiree! So grab your friends and party the night away! The invitations are available as a PDF file so you can print and hand them out to your guests.

In my opinion, a bar cart is a statement piece and can be an extension of your personality. As a bonus, it holds your entertaining essentials! On any given day, my bar cart holds mini spritzer waters, mini champagne/wine bottles, pretty glassware, stirrers and straws!

Here are many reasons why I love using a bar cart for my parties:

1) Versatility
2) Show off your pretty glassware
3) Functional
4) No reason to move the conversation

Bar cart essentials: 
  • Ice bucket
  • Decanter
  • Cork screw and bottle opener
  • Cocktail shaker and strainer
  • Muddler and mixing spoon
  • Cocktails picks, napkins, coasters and straws

How do you style your bar cart? Have any additional ideas I did not share here, if so leave me a comment, you never know, I may style a bar cart with your ideas/recommendations!

I absolutely love being Pier 1's guest stylist throughout the holiday season! I would love to see you at my next event, so mark your calendar for November 3, 2018 at 11:30a for my Thanksgiving Style Event! RSVP here >>


Remember to follow BellaGrey Designs on all your social media channels, you will find the links below this post! Exclusive coupon codes to our shop and free printables throughout the year are shared on our social media. If you like this post, sign up for weekly updates via email. It's FREE! See the sidebar for more information.


Halloween Bar Cart Styling with Pier 1

 Affiliate links are included in this post, which means if you make a purchase using one of the links, I will earn a small commission, but it will not cost you one penny! But it does help to keep my website running. Thank you! The following is based strictly on my honest opinion. I only recommend products and brands I love and use personally. 

This past weekend, I had the pleasure of being the guest stylist once again at my local Pier 1. I styled 1 bar cart 3 ways for a fun Halloween style event.


Since Halloween is "traditionally" orange and black I styled one to please those senses! While I do like the traditional colors, I LOVE stepping outside of the box and styling with very "untraditional" colors and items!!

Its totally OK if you don't have a bar cart, I styled this simple grey accent table as a bar cart and BONUS it has wheels for easy transport and for a party on the go!!! OMGEEEE, how darn fabulous are those copper pumpkin tumblers??! I absolutely love them and how about the mini copper Moscow mule mugs {they are actually ornaments, but I would use them as shot glasses}! Add a few Halloween elements such as these yoga skeletons, a Wicked pillow, glitter pumpkins and my Frightful banner {you can find that in my shop} you have a great bar cart alternative!


I love the mystical colors and feel of this Celestial  bar cart I styled and added the Witchin' Good Time invitation as well, you can see more of the Witchin' Good Time party here. Using this color palette, you could leave this bar cart "dressed" this way for Fall, removing all the mini pumpkins if you would like. This particular themed cart would be magically beautiful for a frightful evening party!

I love pulling out my bar cart and all of my pretty glassware, when I have my girlfriends over. This Silver and Blush bar cart works anytime of year and for any occasion - Halloween, Christmas, Girls Night In, Baby/Bridal Shower and Brunch.


Don't be afraid to "shop" your house for items to place on the bar cart. As you can see I used a blush pink hurricane candle holder as my wine bucket and the modern silver long bowl as a decorative element on the bottom shelf, along with petite glass pumpkins! Most people don't have a set of 10 matching glasses, not to fret, mix and match them! It will look like you did it on purpose and no one will ever know. The mixture of metals is also a great design element, so mix and match away! However you decide to style your bar cart, just have fun with it!


The Boos and Booze invitation is new to my shop this year! There is still time to plan and throw your Halloween Soiree! So grab your friends and party the night away! The invitations are available as a PDF file so you can print and hand them out to your guests.

In my opinion, a bar cart is a statement piece and can be an extension of your personality. As a bonus, it holds your entertaining essentials! On any given day, my bar cart holds mini spritzer waters, mini champagne/wine bottles, pretty glassware, stirrers and straws!

Here are many reasons why I love using a bar cart for my parties:

1) Versatility
2) Show off your pretty glassware
3) Functional
4) No reason to move the conversation

Bar cart essentials: 
  • Ice bucket
  • Decanter
  • Cork screw and bottle opener
  • Cocktail shaker and strainer
  • Muddler and mixing spoon
  • Cocktails picks, napkins, coasters and straws

How do you style your bar cart? Have any additional ideas I did not share here, if so leave me a comment, you never know, I may style a bar cart with your ideas/recommendations!

I absolutely love being Pier 1's guest stylist throughout the holiday season! I would love to see you at my next event, so mark your calendar for November 3, 2018 at 11:30a for my Thanksgiving Style Event! RSVP here >>


Remember to follow BellaGrey Designs on all your social media channels, you will find the links below this post! Exclusive coupon codes to our shop and free printables throughout the year are shared on our social media. If you like this post, sign up for weekly updates via email. It's FREE! See the sidebar for more information.


Affiliate links are included in this post, which means if you make a purchase using one of the links, I will earn a small commission, but it will not cost you one penny! But it does help to keep my website running. Thank you! The following is based strictly on my honest opinion. I only recommend products and brands I love and use personally. 

I can not begin to express how excited I am to announce my partnership with Pier 1! I am so thrilled to be working with them. Every time I enter a Pier 1 store, the inspiration I find is unbelievable and the quality of their home decor is excellent! I can't wait to share the details of my upcoming projects, in the mean time, here is a look from my first workshop with Pier 1.


This past weekend I had the fabulous opportunity to work with Pier 1 at the Irving store on a tabletop workshop event! I styled three tablescapes using some great Pier 1 products, along with some of my printable menus. This was such a delight to have complete access to all of the store's décor. It was like my own prop room ~ what a dream!

Whether is it your average weeknight family dinner or a special occasion, you will typically need to set your table. I have chosen one place setting to create three different tablescapes, to achieve these cohesive looks, I picked a teal gemstone hue to balance out the black and white geometric elements of the plates. The black and white design is grounded by the teal colored dinner plate. 


Although the weather here in Dallas in not cold enough for fur yet, I for one am certainly ready for cooler temps!  Attempting to channel the cooler weather, I styled a more formal table with this beautiful faux fur snow leopard table runner. As soon as I saw it, I knew it would be perfect for this tablescape!


How stunning is the long silver decorative bowl? It was a show stopper for sure! I love the silver finish and the chic texture.  Place some decorative spheres inside and you have an instant wow factor. Speaking of which, the scalloped placemats are made of natural capiz and are exquisite!


Even though, I did not serve food at my event, I did prepare a few sample menus. Let me tell you, after I came up with the desired food items, I sure was hungry and so were the guests! You can order menus in my shop.  Additional touches like these go a long way. 


If you don't have enough of the same napkin, don't fret, just mix and match! I used the ruffled cream napkin and the black and white napkins with tassels and added pretty, yet not matching, napkin rings! 


Kick your family dinner up a notch with these burlap ruffle placemats, teal stemware and fun accent plates. Your family dinners have never looked so good!


Having a spontaneous get-together? Skip the tablecloth, table runner and placemats and let your table shine by itself! This is not only easy but very chic as well. I prefer to layer my tablesetting as it adds texture and color. 


When the weather is right, take dining outside and enjoy an alfresco dining experience. Adding candles sets the tone and lightens up the moods. If your guests are allergic to candle smoke, simply opt for smokeless candles or battery operated ones. 


It was exciting to see BellaGrey Designs on the store's chalkboard, on a table inside the store! I had so much fun sharing ideas and inspiration with all the guests who attended the workshop and I look forward to sharing more in my upcoming workshops! If you want to be informed on when my next workshop is, please feel free to subscribe to my newsletter and follow BellaGrey Designs on all social media channels.  


I can not begin to explain how excited and thankful I am for this incredible opportunity! I am humbled by your positive feedback and encouragement. 

Thank you and I can't wait to share more of my work with this incredible brand!


Remember to follow BellaGrey Designs on all your social media channels, you will find the links below this post! Exclusive coupon codes to our shop and free printables throughout the year are shared on our social media. If you like this post, sign up for weekly updates via email. It's FREE! See the sidebar for more information.


Pier 1 In-Store Tablescape Event

Affiliate links are included in this post, which means if you make a purchase using one of the links, I will earn a small commission, but it will not cost you one penny! But it does help to keep my website running. Thank you! The following is based strictly on my honest opinion. I only recommend products and brands I love and use personally. 

I can not begin to express how excited I am to announce my partnership with Pier 1! I am so thrilled to be working with them. Every time I enter a Pier 1 store, the inspiration I find is unbelievable and the quality of their home decor is excellent! I can't wait to share the details of my upcoming projects, in the mean time, here is a look from my first workshop with Pier 1.


This past weekend I had the fabulous opportunity to work with Pier 1 at the Irving store on a tabletop workshop event! I styled three tablescapes using some great Pier 1 products, along with some of my printable menus. This was such a delight to have complete access to all of the store's décor. It was like my own prop room ~ what a dream!

Whether is it your average weeknight family dinner or a special occasion, you will typically need to set your table. I have chosen one place setting to create three different tablescapes, to achieve these cohesive looks, I picked a teal gemstone hue to balance out the black and white geometric elements of the plates. The black and white design is grounded by the teal colored dinner plate. 


Although the weather here in Dallas in not cold enough for fur yet, I for one am certainly ready for cooler temps!  Attempting to channel the cooler weather, I styled a more formal table with this beautiful faux fur snow leopard table runner. As soon as I saw it, I knew it would be perfect for this tablescape!


How stunning is the long silver decorative bowl? It was a show stopper for sure! I love the silver finish and the chic texture.  Place some decorative spheres inside and you have an instant wow factor. Speaking of which, the scalloped placemats are made of natural capiz and are exquisite!


Even though, I did not serve food at my event, I did prepare a few sample menus. Let me tell you, after I came up with the desired food items, I sure was hungry and so were the guests! You can order menus in my shop.  Additional touches like these go a long way. 


If you don't have enough of the same napkin, don't fret, just mix and match! I used the ruffled cream napkin and the black and white napkins with tassels and added pretty, yet not matching, napkin rings! 


Kick your family dinner up a notch with these burlap ruffle placemats, teal stemware and fun accent plates. Your family dinners have never looked so good!


Having a spontaneous get-together? Skip the tablecloth, table runner and placemats and let your table shine by itself! This is not only easy but very chic as well. I prefer to layer my tablesetting as it adds texture and color. 


When the weather is right, take dining outside and enjoy an alfresco dining experience. Adding candles sets the tone and lightens up the moods. If your guests are allergic to candle smoke, simply opt for smokeless candles or battery operated ones. 


It was exciting to see BellaGrey Designs on the store's chalkboard, on a table inside the store! I had so much fun sharing ideas and inspiration with all the guests who attended the workshop and I look forward to sharing more in my upcoming workshops! If you want to be informed on when my next workshop is, please feel free to subscribe to my newsletter and follow BellaGrey Designs on all social media channels.  


I can not begin to explain how excited and thankful I am for this incredible opportunity! I am humbled by your positive feedback and encouragement. 

Thank you and I can't wait to share more of my work with this incredible brand!


Remember to follow BellaGrey Designs on all your social media channels, you will find the links below this post! Exclusive coupon codes to our shop and free printables throughout the year are shared on our social media. If you like this post, sign up for weekly updates via email. It's FREE! See the sidebar for more information.


Christmas Gift Wrap Ideas

I'm super excited to team up with a few of my blogger friends to bring you some great Christmas gift wrap ideas. Welcome to everyone vis...

Meet Jennifer

Meet Jennifer
God made and Jesus saved! This Colorado girl is living in a Texas world. I'm a home decor enthusiast, sharing our home, fashion and entertaining tips.

My Favorites

Recommendations

@Instagram